
Before I moved to New Zealand, I knew that one of my main priorities was going to be finding some of the best hikes to do. Through people I met in Colorado who had been to New Zealand before, I heard of this thing called the “Great Walks” – which I later learned more about after moving here. One of these Great Walks is the Routeburn Track and in this post I will talk all about tips for doing this Great Walk as well as my personal experience hiking the track.
The Routeburn Track is my first Great Walk. There are several more on the list to do before I leave the country, but so far this time I was delighted with the stunning scenery. Just as I was taken aback by the beauty of Milford Sound and the rest of Fiordland National Park, the Routeburn Track didn’t disappoint.
Table of Contents
What is a Great Walk?
“Great Walks” are multi-day hikes (some can also be bike or paddle trips) designated by the government of New Zealand as places to see exceptional natural wonders or are tracks of great historical significance. The Great Walks system was first established in 1992 in an effort to preserve popular hiking trails by designating huts and campsites on the tracks and limiting the number of hikers to reduce environmental impact.
There are 10 Great Walks (though they are working on designating more in the future), and these are recognized as some of the most popular and scenic in all of New Zealand. The Great Walks are located all around the country in varying landscapes, and most of them lie within national parks. All of the tracks are designed to be done over multiple days, though there are some you can do in one day, or you can do parts of them in shorter chunks as day hikes.
Information About the Routeburn Track
Location: The track straddles both Mount Aspiring and Fiordland National Parks in the southern tip of the South Island.
Distance: 33.1 km one way, usually done over 3 days
Elevation: The trail starts at 500 meters and climbs to 1250 meters at its highest point with about 1400 meters of total elevation gain.
Weather: This track is located in a very wet part of New Zealand, with about 200 days of rain each year. This means the trail has an incredible amount of waterfalls (one of the best parts of hiking this track), but of course also means sometimes rain or snow any time of year especially in the higher elevations. The higher parts of this track are also prone to avalanches, especially in winter and spring.

The Routeburn Track travels over a mountain range between Fiordland and Mount Aspiring National Parks, offering stunning views of some of the glacier-carved mountainous landscapes in the area as well as the many lovely waterfalls that are common in the region. While this track is famous for its beauty, it is believed that it was a main route for the Maori people long before Europeans arrived in New Zealand and then later as a route of transport until the Milford Road was built; both of these reasons cemented its placement as a Great Walk in New Zealand.
There are two entrance points to this track: one is called the Routeburn Shelter near Glenorchy, and the other is the Divide near Milford Sound. You can hike this track in either direction over 2-4 days depending on how fast you want to go. It’s also possible to hike or run this track in one day if you start early enough!
How to Book the Routeburn Track
All of the Great Walks have various campsites or huts that hikers can stay at throughout their time on the tracks, which generally need to be booked in advance during the main season (spring to fall from November to April). Bookings for the year open up every April or May. Some of the tracks sell out very quickly, such as the Milford Track (which sold out in 4 hours in 2023) and the Routeburn Track.
In addition to booking campsites, most people choose to book return transport as well since most of the Great Walks are not loop tracks. The same goes for the Routeburn – one end of the track is a four hour drive from the other end, so it’s often easier to just get transportation to and from each end of the hike. You can also have your car relocated, but this is only cost-efficient for three or more people.
See more about booking huts or campsites and transport below.
Routeburn Track Camping/Hut Options

Along the Routeburn Track, there are only two campsites and three huts. The two campsites are located on either end of the trail at Routeburn Flats and Lake Mackenzie. There are also huts at these locations, as well as a third hut along the middle section of the trail called Routeburn Falls.
Most people do this hike over 3 days starting at the Routeburn Shelter and stay at either Routeburn Flats or Routeburn Falls and then Lake Mackenzie (although it’s possible to do the hike in reverse starting at the Divide).
The huts and campsites set along the track are all in beautiful locations, some with swimming spots, and have cooking facilities and restrooms for campers. Below is the pricing structure for the huts and campsites during the Great Walks season (October-April). Pricing varies during winter months (May-September).
New Zealand Residents*:
Huts: $68/pp
Campsites: $21/pp
*If you’re international but have been living in New Zealand for at least 6 months, you can qualify for this rate with proof of utility bills or pay stubs.
International Visitors:
Huts: $102/pp
Campsites: $32/pp
Here you can find the link to book huts and campsites, as well as additional info from the Department of Conservation (DOC).
Which is Better: Huts or Campsites on the Routeburn Track?
There are pros and cons to each option, outlined below:
Huts:
Pros: Beneficial if you want an indoor space to relax after hiking; good for getting out of inclement weather; come with flush toilets, gas stoves, water taps, sinks, fireplaces; sometimes swimming nearby; “summer camp” community feel; you carry less stuff (no tent, no need for gas canister or stove); more convenient placements along the track
Cons: You have to share a bunk room with other people, so not much privacy or quiet; expensive; less time out in nature
Campsites:
Pros: Beneficial if you have your own tent and hiking stove; you can have your own space; come with pit toilets, a cooking shelter with a sink, and a water tank; there is swimming nearby; more time outside in nature; relatively inexpensive
Cons: Not a great choice if you don’t feel comfortable with the possibility of setting up or putting away tent in the rain, if you don’t have a warm sleeping bag or appropriate sleeping layers if you’re hiking in the shoulder season, or if you don’t have all the camping and cooking gear required to be self-sufficient
My Experience Camping on the Routeburn
When I booked this track around August or so of 2023, almost all of the huts and campsites for the entire Great Walks season were already booked out. This is why I ended up going on this hike in mid-November, only two weeks after the Great Walks season started and a time when it’s still common to have snow and cold weather on the trail. If you have the chance, be sure to book this hike well in advance especially if you want warmer days to do this hike.
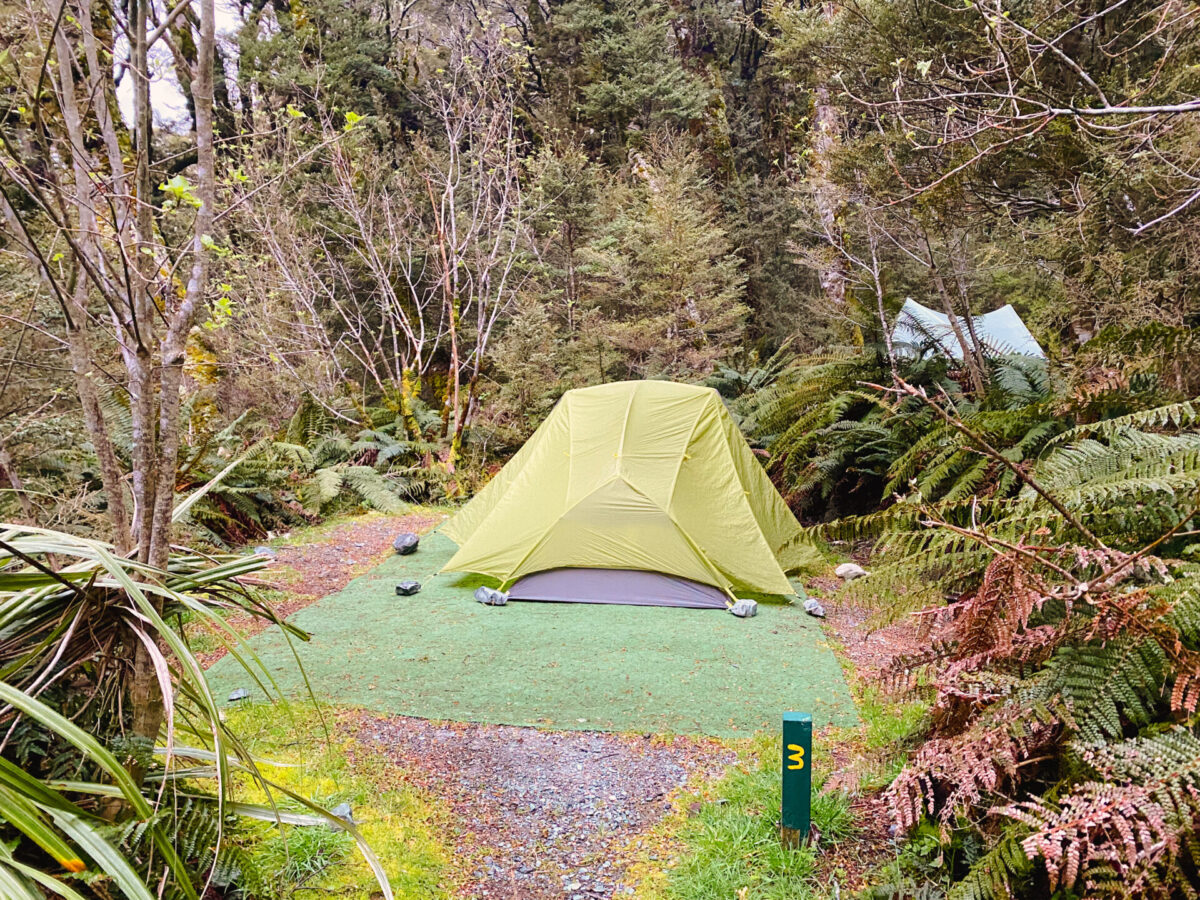
I brought all of my camping gear over to New Zealand, including my tent and cooking stove, so I was more than prepared to set up camp as opposed to staying in the huts. I personally felt like I would enjoy my experience in nature more if I was camping. I also have experience camping in cold shoulder season weather and came prepared with a warm sleeping bag and plenty of layers for keeping warm in my tent. My tent was a little wet in the morning when I packed up, but since I was only camping for one night I was able to get back home later that day and lay out my tent to dry.
The huts are spaced out a little better than campsites on the track so doing three days splits up the distance more evenly for those wanting to take their time. Since I chose to camp, I decided to do the hike in only two days because of the placement of the campsites. From where I started at the Routeburn Shelter, the first campsite (Routeburn Flats) was only about an hour and a half from the starting point. I felt that even though this made my first day very long, I would rather just have an extra hour and a half added onto my day rather than be at my campsite by noon.
However, the Routeburn Flats area was beautiful and could be a great spot to relax for the day and go swimming during the warmer summer months if you want to camp and break up the hike a little more. Alternatively, if you do the hike in reverse and start at the Divide, it makes more sense to stay at the Routeburn Flats campsite the night before you catch the bus back to Queenstown or Te Anau and since it’s so close to the end point, you can catch the morning bus back instead of the afternoon bus.
Another cool thing about spacing out the hike a little more is that you have more time for side trips! I didn’t do any during my hike because the weather wasn’t great and I wouldn’t have been rewarded with extra views, but Conical Hill is a 2 hour return from Harris Saddle and Key Summit is an hour return near the Divide.
Routeburn Track Transport

I made the mistake of NOT researching much about the track or the transport needed when I booked, and I was sorely disappointed how expensive the return bus was. Unfortunately many of New Zealand’s Great Walks require some form of private transport and these companies can charge as much as they want since there’s not a good way to do most of the Great Walks without them (unless you do out and back trips or hitchhike).
Return Bus or Car Relocation
From one end of the Routeburn to the other, driving is about 4 hours one way, so most people opt for a return bus to and from both end points, which costs about $150 round trip. There is also the option of having your car relocated to your end point, which costs about $300 plus gas (this option is most cost-efficient with 3 or more people in your group). I booked my bus with Info and Track, but there are a few other operators in Queenstown and Te Anau that offer the same service and/or car relocation.
Hitchhiking
If you want to avoid paying for the bus, it is also very possible to hitchhike from the Divide back to Te Anau or Queenstown. I saw two hikers do this successfully while myself and at least 15 other hikers waited in the shelter for our buses to arrive. There are so many people driving back from Milford Sound that pass by the Divide all day every day, and all of them are passing through at least Te Anau and maybe also Queenstown. It’s a pretty safe bet that you’ll get picked up if you arrive early enough in the day. I don’t recommend doing this from the Routeburn Shelter as this entrance is less busy and therefore more of a risk.
Key Swaps
If you’re determined to drive to one of the entrances, you could also do a key swap with another group of hikers who are doing the track on the same dates as you, but in the opposite direction. You can do this by meeting each other along the trail (probably around the halfway point) and then driving each other’s cars back to a meeting point somewhere between Te Anau and Queenstown. Of course, this requires a lot of trust and planning on the part of both parties! There are a few tramping pages on Facebook where it’s possible to find key swap mates.
Safety Tips & Packing Essentials on the Routeburn Track
What to Pack
- 40-60 Liter backpack
- 3 season sleeping bag
- sleeping bag liner (if camping in shoulder season and you don’t have a 4 season sleeping bag)
- 3 season sleeping pad (if camping)
- 3 season tent (if camping)
- backpacking stove, fuel canister and lighter (if camping)
- cutlery, cup, bowl, pot
- enough food and snacks to last for your trip (plus a little extra just in case)
- headlamp
- cold weather clothing (down jacket, fleece or sweater, long sleeve layers, pants, beanie, gloves, neck gaiter, extra pants layer, etc.)
- warm weather clothing (quick drying t-shirt, quick drying shorts)
- wet weather clothing (waterproof jacket, water resistant and quick drying pants and/or waterproof pants)
- extra set of clothes to sleep in and camp shoes (sandals or crocs work well)
- toiletries
- first aid kit/medications
- water bottles or water bladder (at least 2 liter capacity) plus a water filter
- phone and portable phone charger
- hiking boots or trainers (waterproof and with good traction)
- poop shovel and toilet paper (JUST IN CASE)
- optional: hiking poles, headphones, book or journal/pen, camera
Safety
This track is well marked and maintained with plenty of places to stop and rest, take a bathroom break or fill up water if needed. With that being said, accidents and emergencies do happen so here are a few tips to minimize any problems on the track:
- Bring at least 2 liters of water every day (there are water tanks at every hut and campsite, as well as rivers and waterfalls along many parts of the trail).
- Be sure to filter or treat any water you take while on the trail as none of it is treated.
- Keep your phone charged to use as a GPS (without wifi), in case of emergencies and of course as a camera! My favorite GPS app to use is Maps.me which allows you to download GPS maps for free to use offline. This has helped me on many trails and I can’t emphasize enough how important this is to have on a hike in case you get lost.
- Bring enough layers to stay warm and dry on the hike, including extra clothes if you have a wet forecast ahead.
- Wear appropriate hiking shoes with grip traction, comfort and stability.
- Bring extra food and snacks. For example, I met a group on my bus from the Routeburn Track back to Queenstown that got stuck on the Milford Track for an extra day due to flooding. While they stayed at their hut they had to ration out their food so they had enough to finish the rest of the hike. You just never know, so bring that bit of extra food.
- Don’t attempt this hike outside of the Great Walks season unless you have navigation experience, are trained in handling avalanches and have survival gear.
- Tell people where you’re going and what your itinerary is!
My Routeburn Itinerary
Day 1: Routeburn Shelter to Lake Mackenzie Campsite
Distance: 21.1 km
Time: Roughly 7 hours including breaks
Difficulty: Hard! Oof.
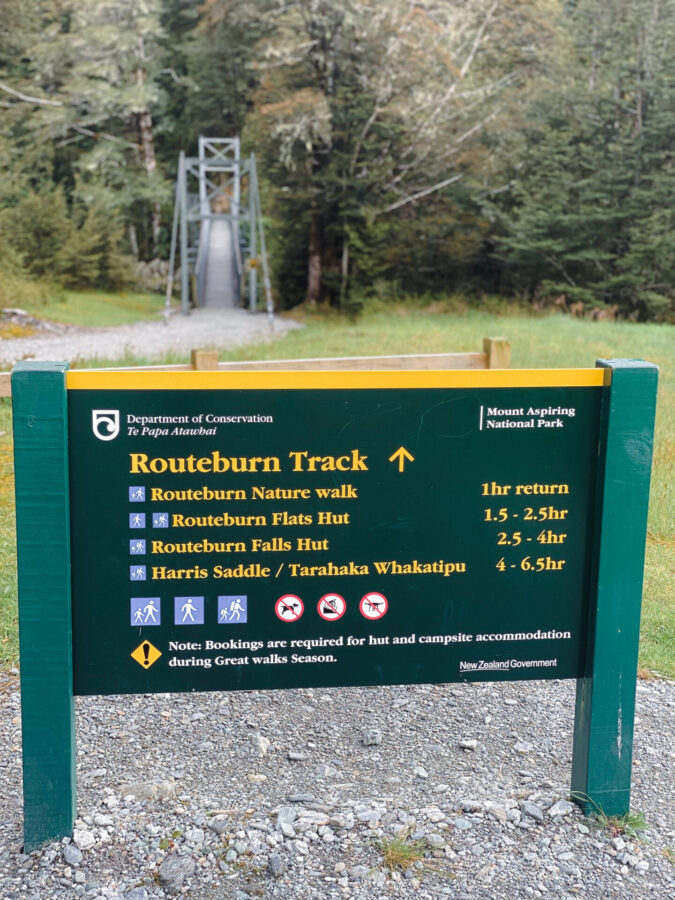
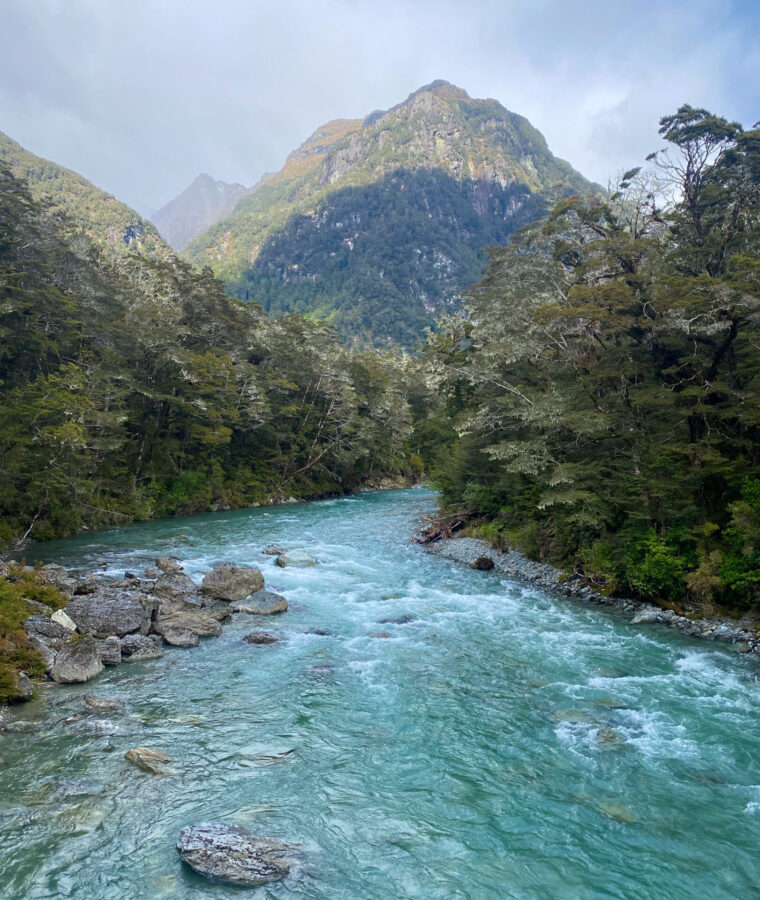
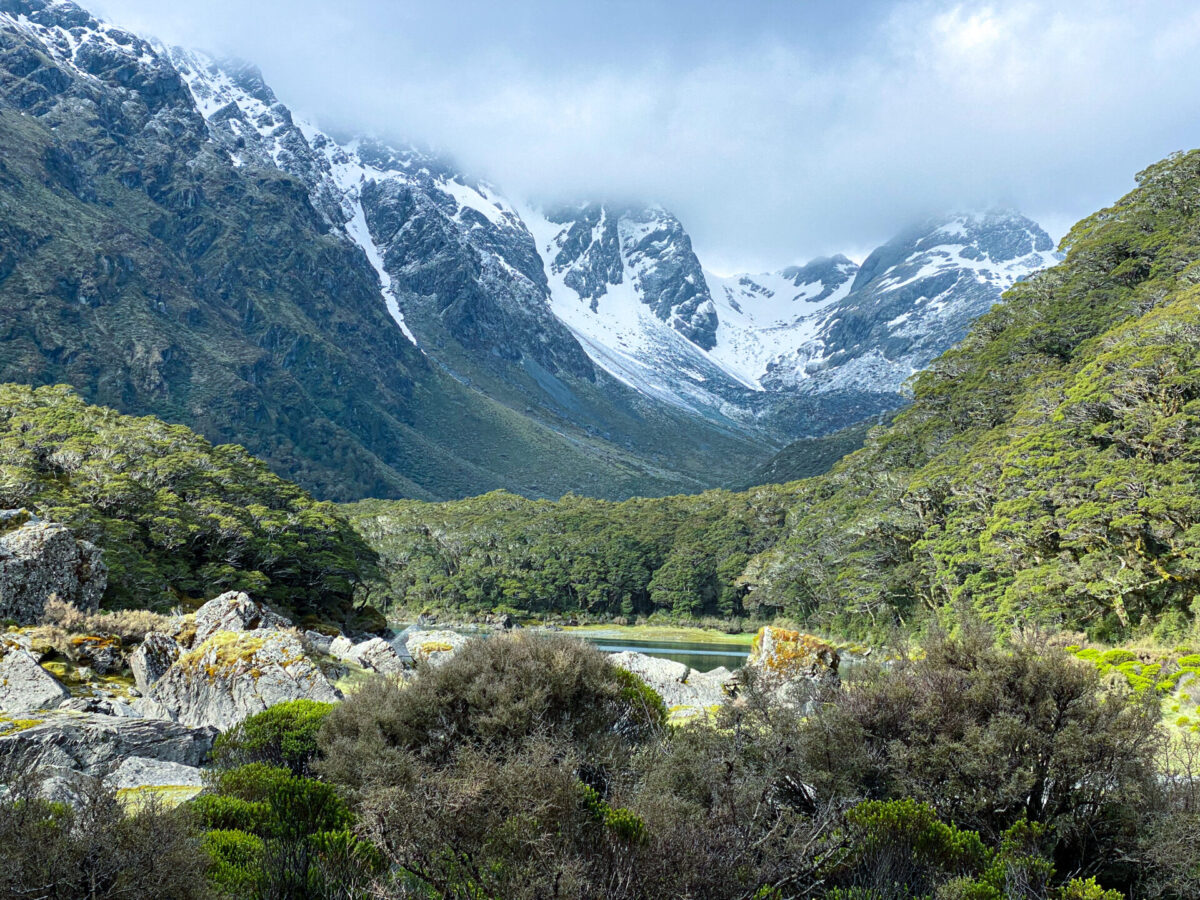
The start of the track began at Routeburn Shelter. This entrance point is close to Glenorchy, which is about an hour’s drive away from Queenstown. Since I paid for roundtrip transport for this hike, I got dropped off at the Routeburn Shelter and then began hiking. This section of the trail starts in Mount Aspiring National Park and brought me up through Beech forest and alongside the Route Burn River, sometimes passing over swing bridges with turquoise waters flowing underneath.
It was overcast and a little rainy for most of my first day hiking, and I knew there may be a forecast of snow and colder temperatures as I ascended into the mountains, so I came prepared with a down jacket, a waterproof jacket, and extra layers.
After about an hour and a half, I reached the first hut and campsite, Routeburn Flats. The Routeburn Flats sits before a wide valley floor with a river running nearby and some mountain views all around. After briefly stopping at Routeburn Flats to take in the view (from the valley floor in the photo below) and have a snack, I continued onward.

So far the hike up to this point was pretty gradual, but the next section was quite tough and steep all the way up to the Routeburn Falls Hut, which took me another hour to reach. When I arrived, I sat down on one of the benches outside the hut on the wrap-around deck which overlooked the valley below. I sat there eating my lunch while observing the breathtaking view from my chilly spot on the bench.
The Routeburn Track abounds with waterfalls, especially during and after periods of rain. Just past the Routeburn Falls Hut, after eating my lunch and taking in the views of the valley below, I came across some spectacular waterfalls – the Routeburn Falls.
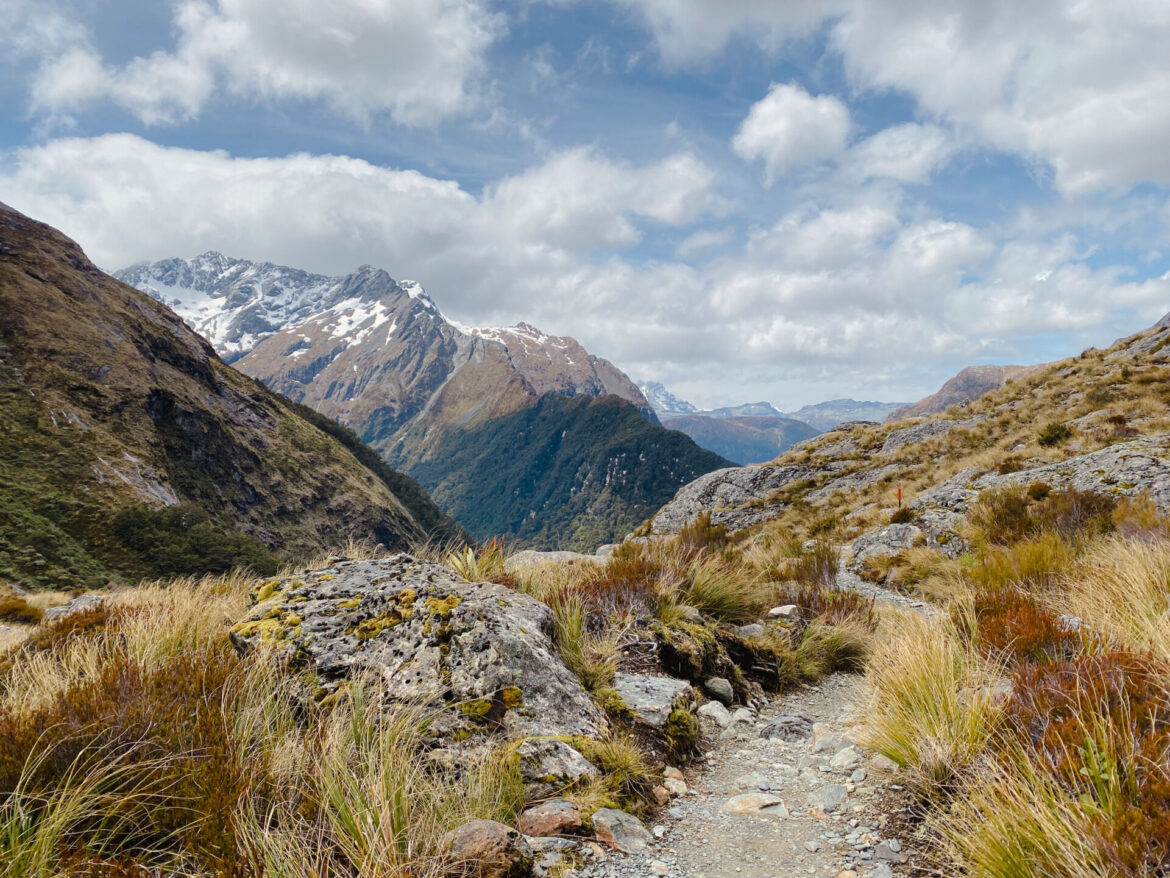
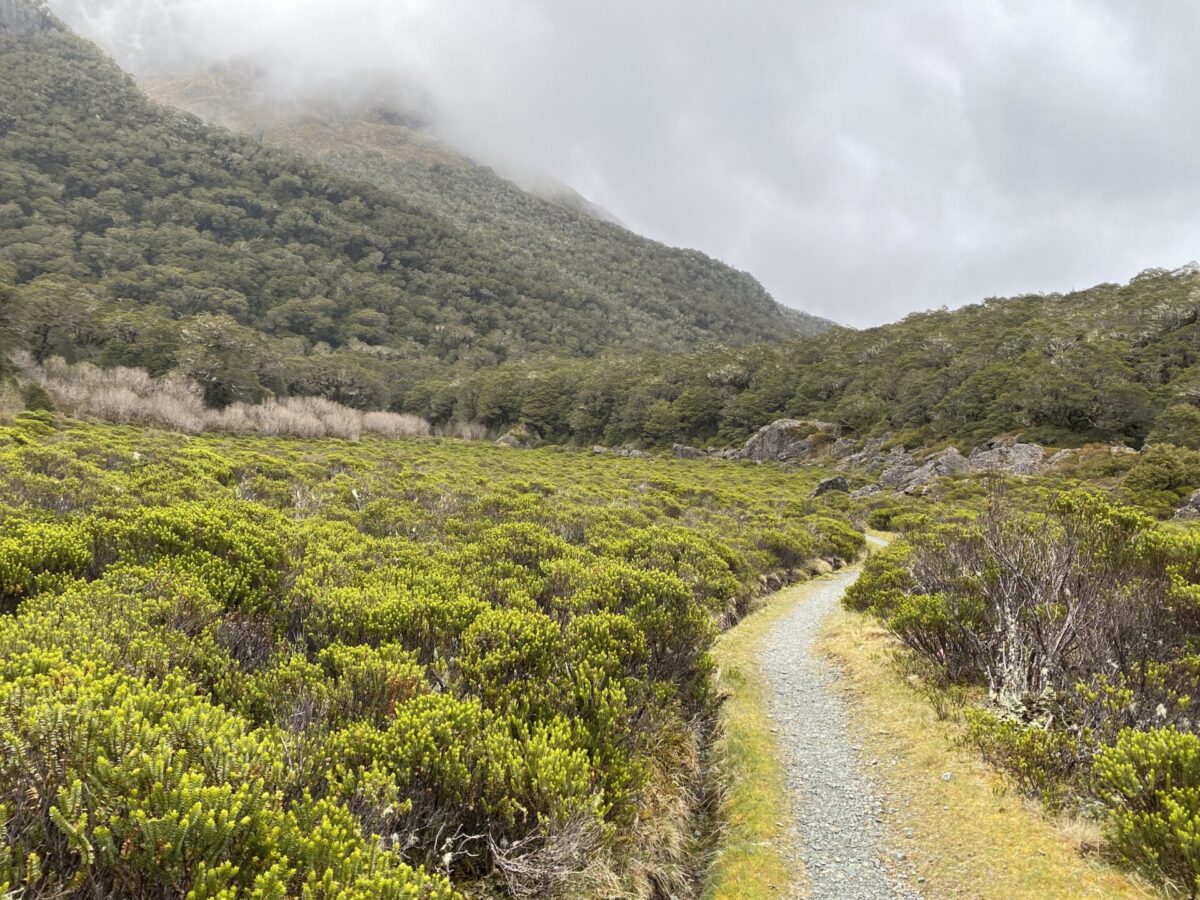
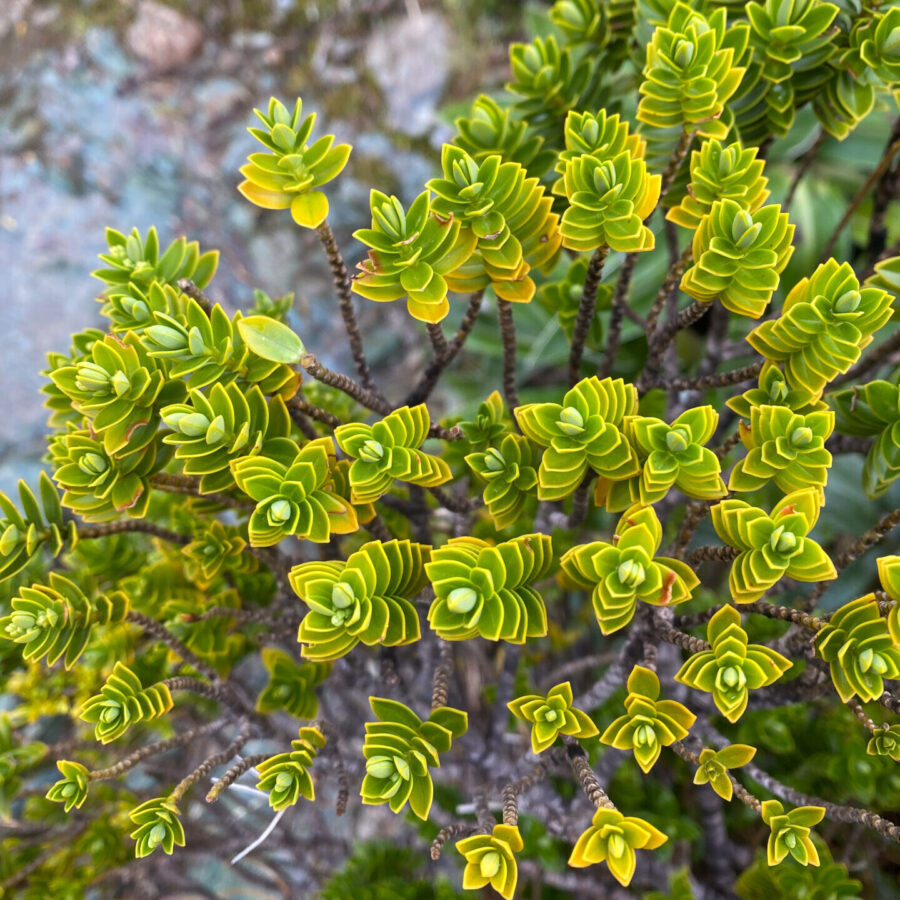
I continued climbing for a couple hours through alpine meadows full of tussocks, grasses and other unique high alpine plants on the way towards Harris Saddle. At this point, it was snowing slightly, quite cold and there was total cloud coverage, so I had to put on my beanie, gloves and puffy down jacket to keep me warm, but even despite the weather, the misty meadows were so enchanting.
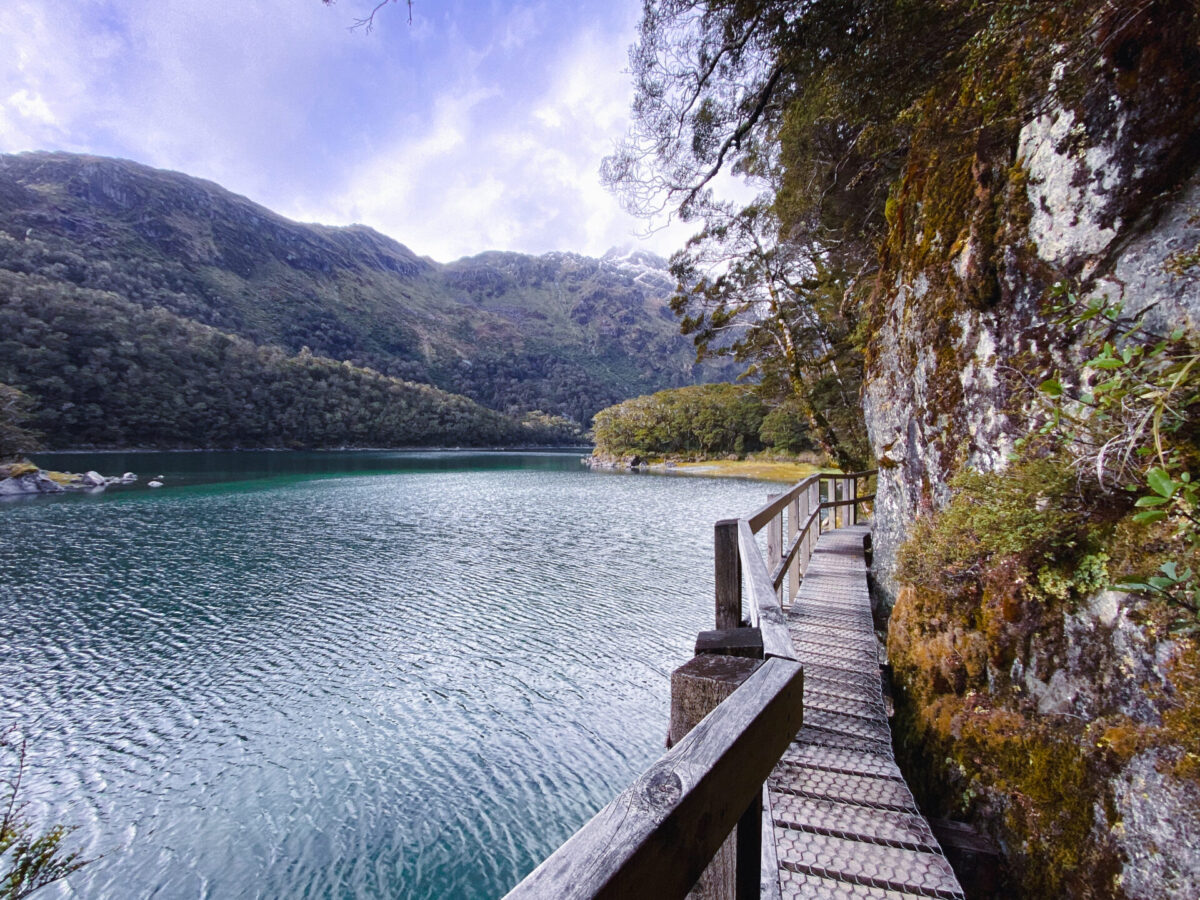
I eventually came to Lake Harris while hiking alonside the cliff edge. This was one of my favorite scenes from the day! Just around the corner to the left of the lake lies Harris Saddle, the highest point on the trail.
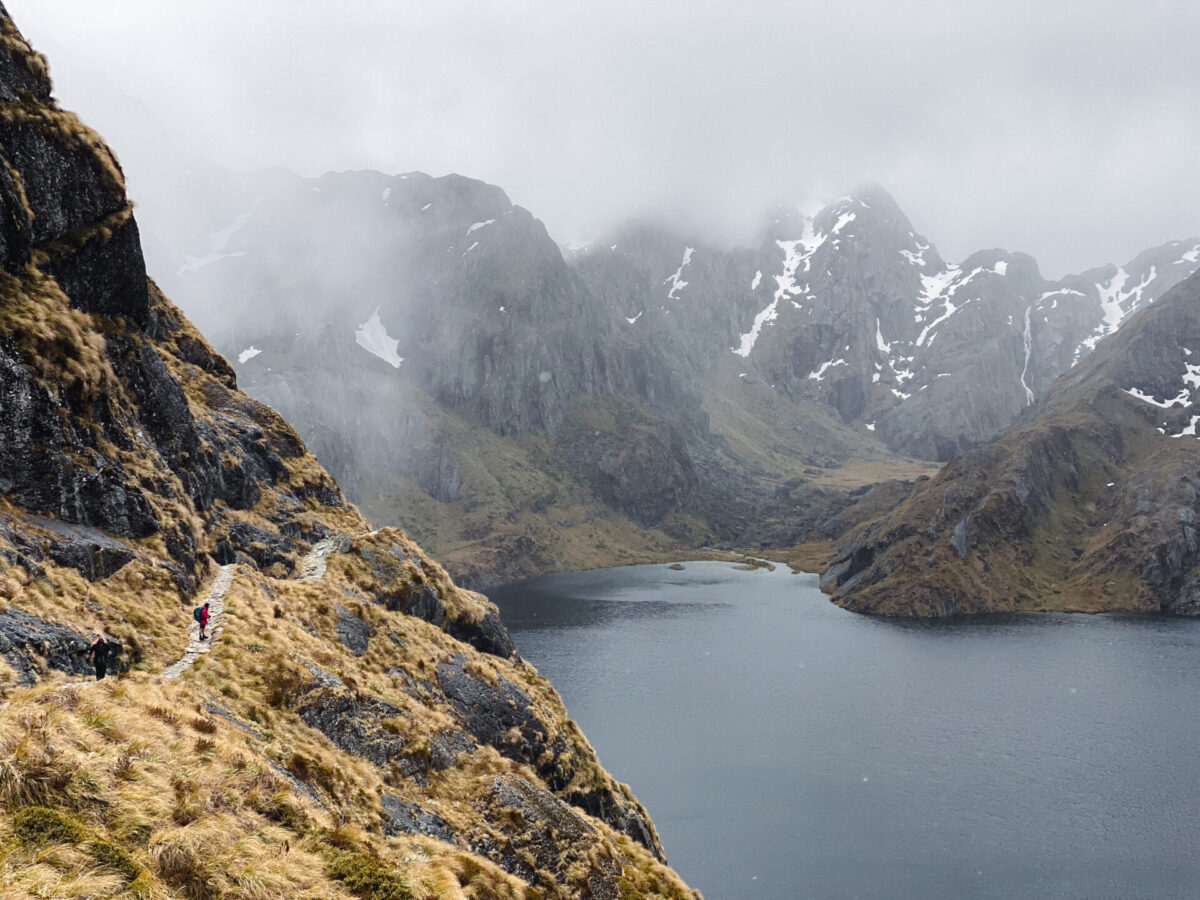
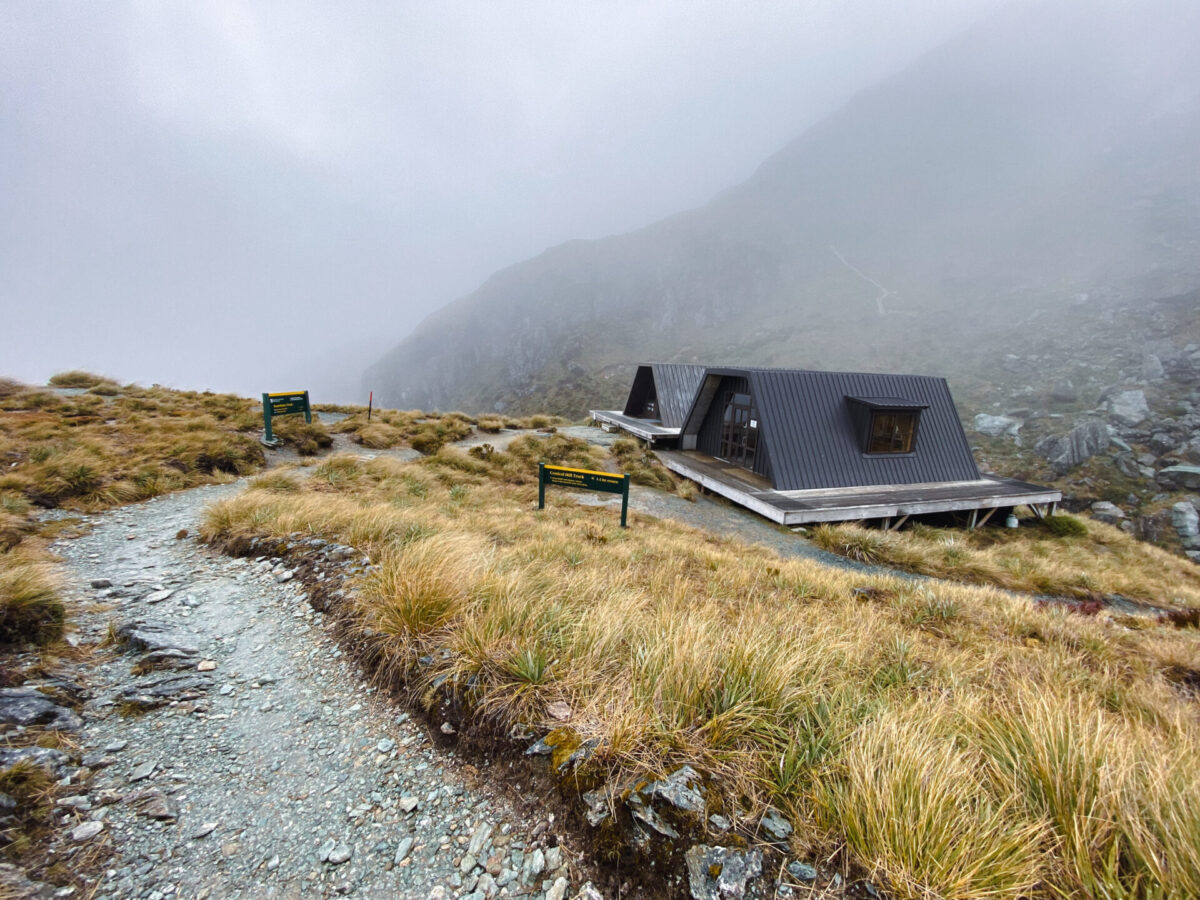
I was relieved after this last stretch to finally reach the Harris Saddle and the day shelter there. I was quite cold, exhausted, and hungry, and wanted to go inside to warm up and refuel with some more food and water. At this point I had been hiking for close to 5 hours. I hadn’t done any long hikes like this in over a year, as I went from one winter in Colorado directly to another winter in New Zealand, and spent more of my time snowboarding than doing any sort of uphill exercise. Needless to say, my body wasn’t ready for this complete day of challenging hiking, and so I was very relieved to finally reach the highest point on the track. I knew the rest would be pretty much all downhill from there.
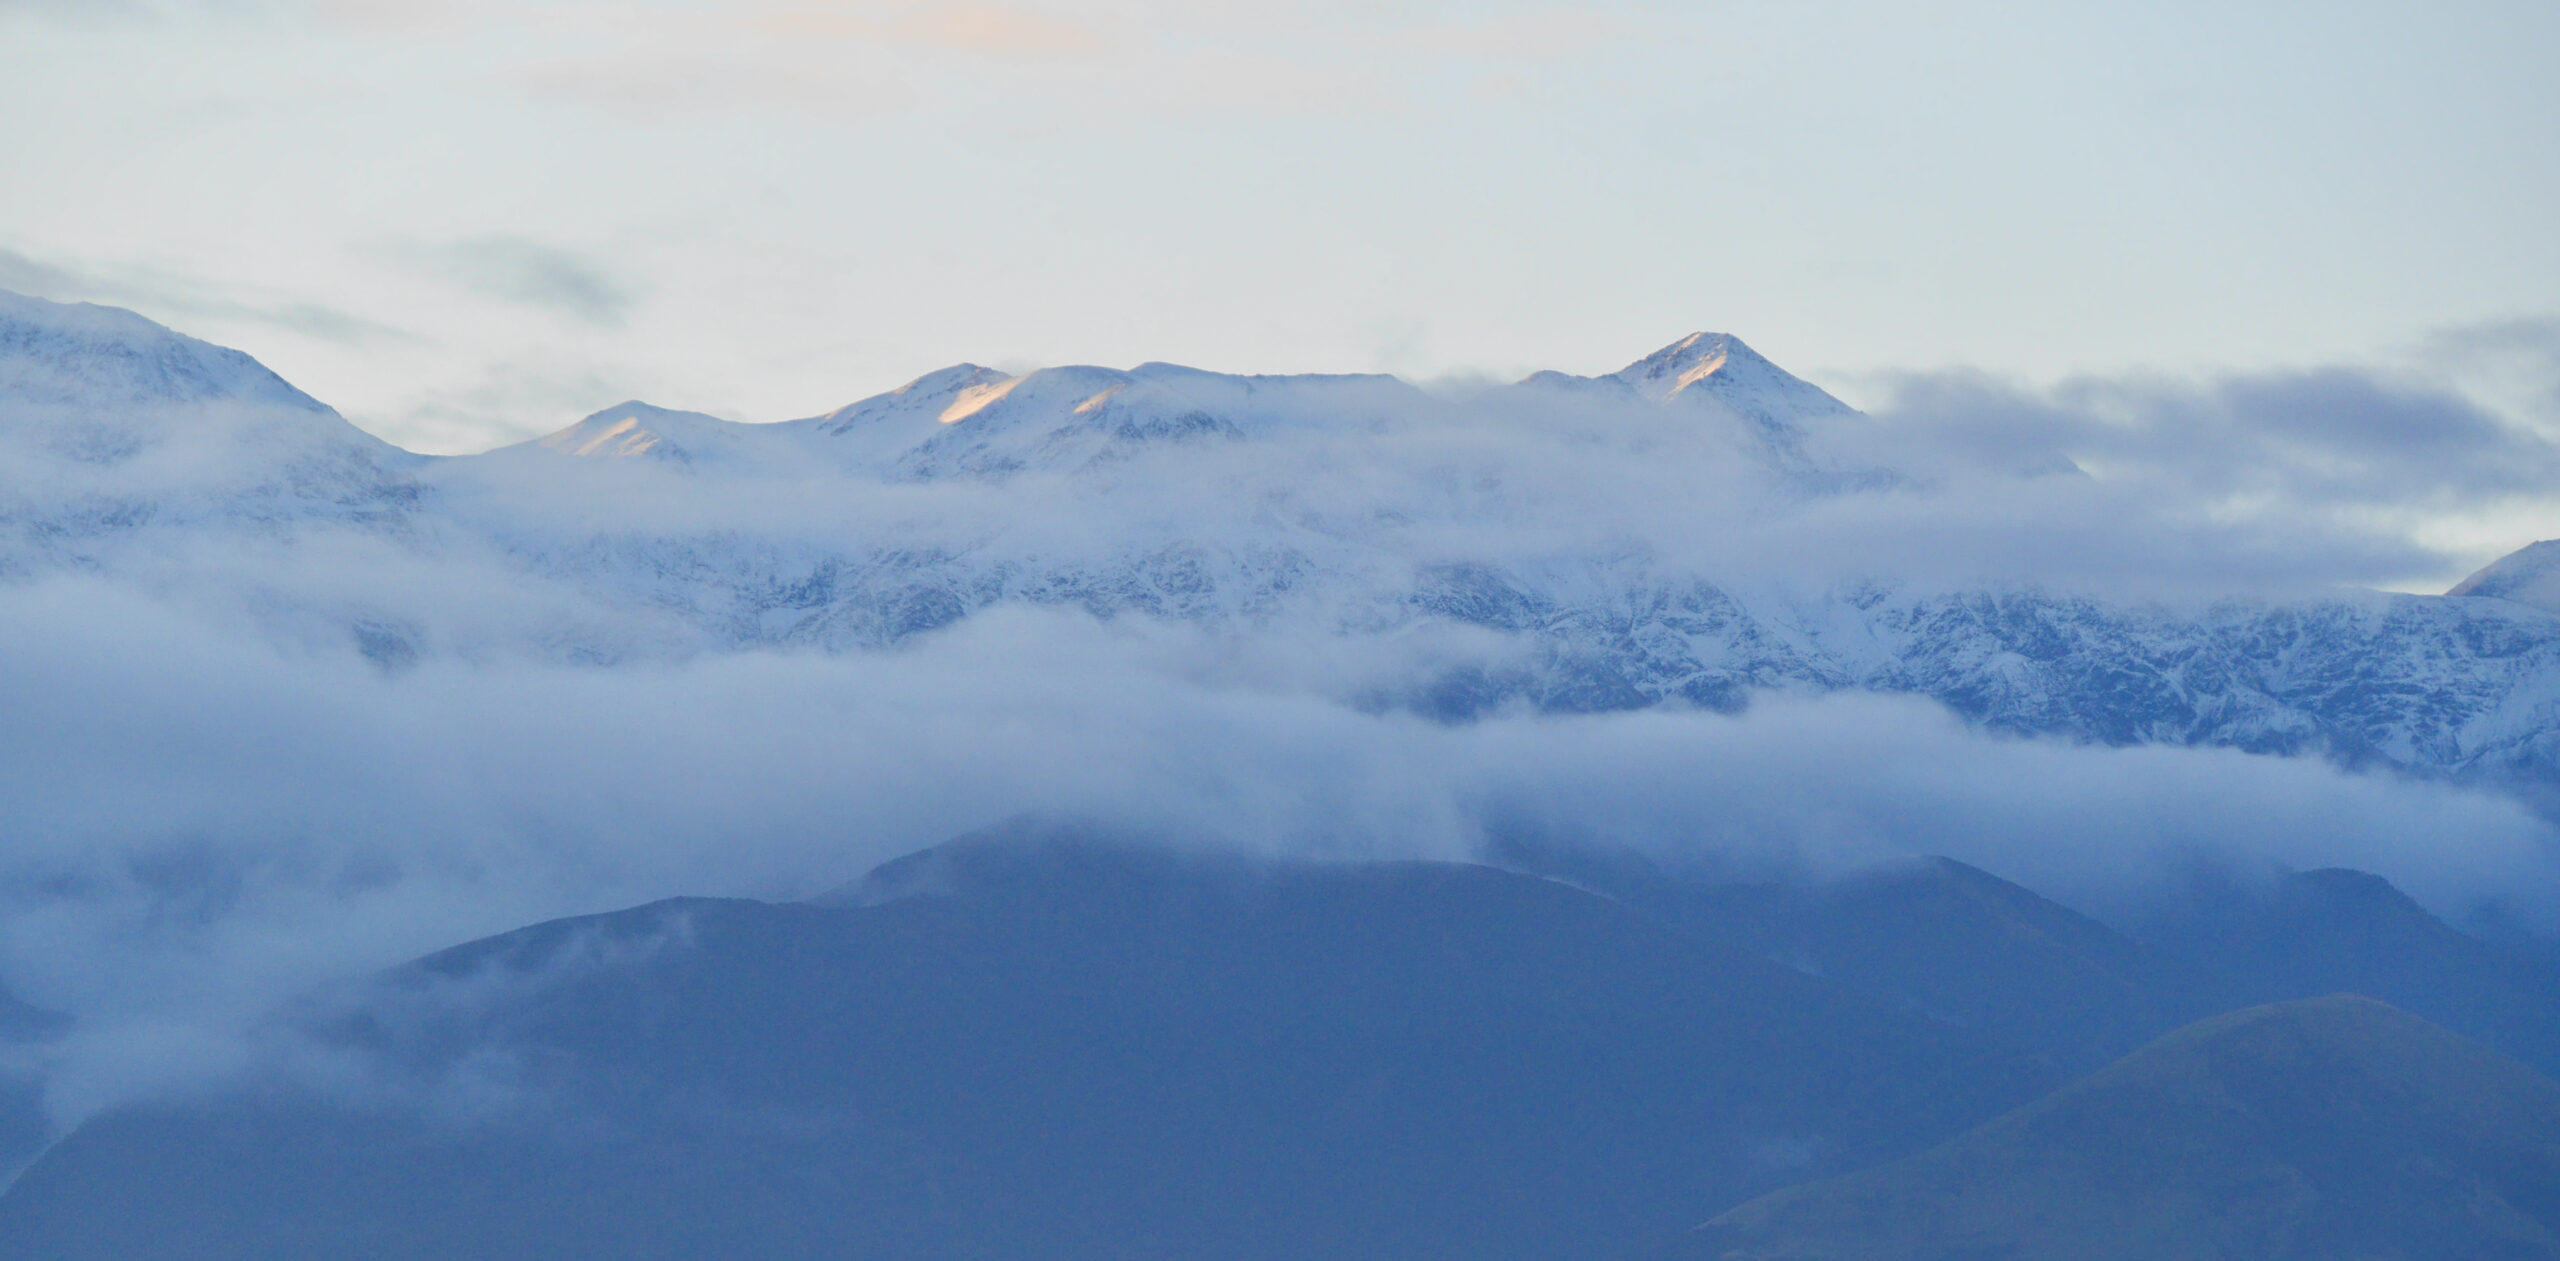
Though I did encounter light rain throughout my hike and a bit of snow while passing over the higher elevations, it did not in any way make for a bad experience. I had great views the whole time, except for about an hour or so at the very top of the trail after passing over Harris Saddle and hiking down towards Lake Mackenzie campsite. It would have been nice to see something more than clouds during that section but I saw so many stunning landscapes that I wasn’t really mad about it! The clouds high up in the mountains are beautiful in their own way, too.
By this point in the day, there weren’t many other hikers in the area since most people doing the track stay in the huts or campsites along the trail. Since I had already passed two huts and one campsite, I had left behind most of the other hikers that day who had already settled into their spots for the night. While in the shelter, I came across 4 other hikers and we all chatted for a bit while seeking refuge from the cold. Eventually I got ready to hike again and began descending to Lake Mackenzie. I didn’t see another hiker until I got down to the campsite a couple hours later!
After the Harris Saddle, the clouds remained blocking any views for about an hour, but thankfully it wasn’t snowing or raining at that time and the temperature warmed up slightly after I started hiking down, so I just had to focus on getting to Lake Mackenzie Campsite, where I was booked for the night to stay in my tent.
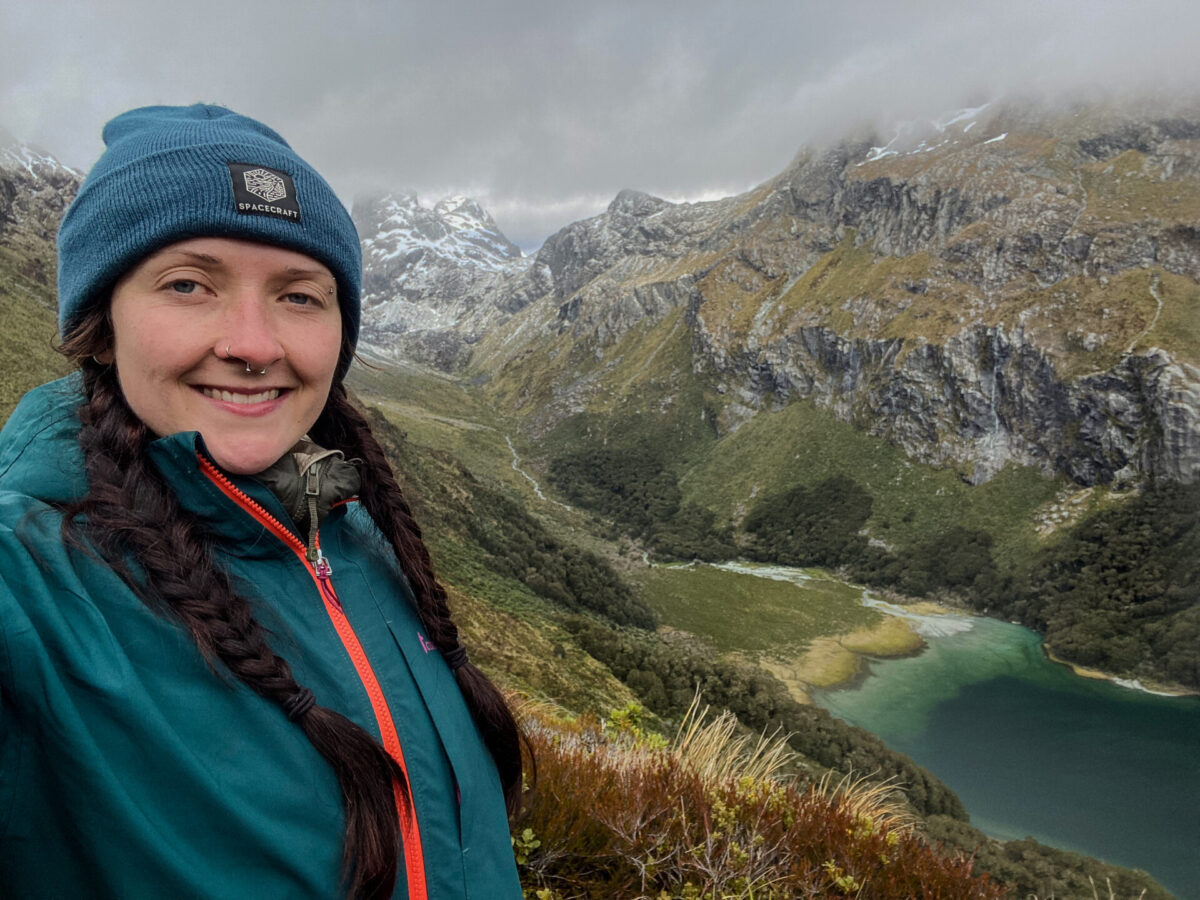
At some point a couple hours after leaving Harris Saddle, the clouds opened up and I could again see some mountain views. I really loved the view above Lake Mackenzie, and I was stoked because that meant I was ALMOST done hiking for the day!
I walked through to the campsite, where I set up my tent and went to the cooking shelter to make some dinner. There I befriended a group of friendly hikers from Auckland who were cooking at the shelter when I arrived. After eating dinner and warming up with some herbal tea, I packed up my cooking gear and went back to my campsite for the night! I put on all my warm layers and curled up in my sleeping bag (with my sleeping bag liner for extra warmth).
Day 2: Lake Mackenzie to the Divide
Distance: 12 km
Time: About 4 hours
Difficulty: Easy (mostly downhil)
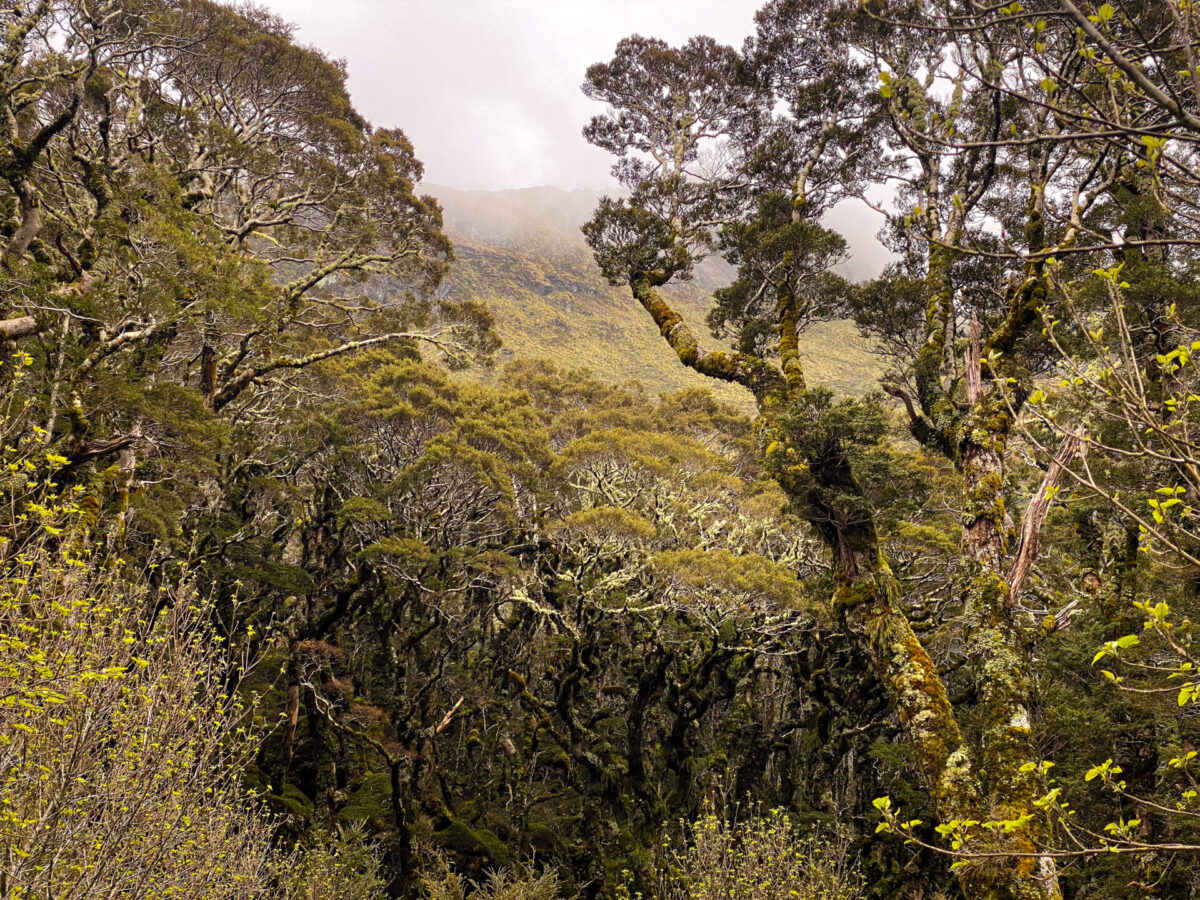
The next morning, I slept in a little after a very long first day of hiking! In the morning, I did some serious stretching, made myself some breakfast with the Auckland hikers, and then continued on hiking around 10 am. For most of the day, I continued walking through Beech Tree forest while descending towards the Divide. Though I had somewhat less views than the day before, there were still so many beautiful sites, such as the Earland Falls (at 174 meters) below. I stayed here for a while taking in this massive waterfall. I couldn’t help but take a dozen photos and videos from different angles while smiling to myself with stunning admiration. The many waterfalls all along this hike were breathtaking, but this one was by far my favorite.

I really was hoping to add the Key Summit hike (it’s about another hour) onto my second day, but it was overcast and rainy and for me it wouldn’t be worth it unless I would get spectacular views at the top, so I sadly skipped it.
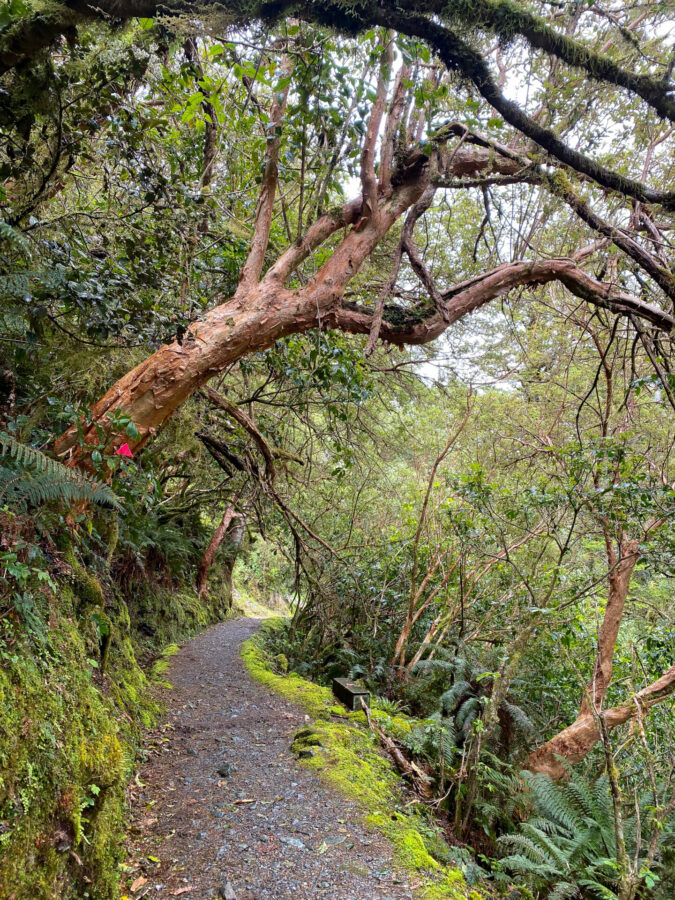
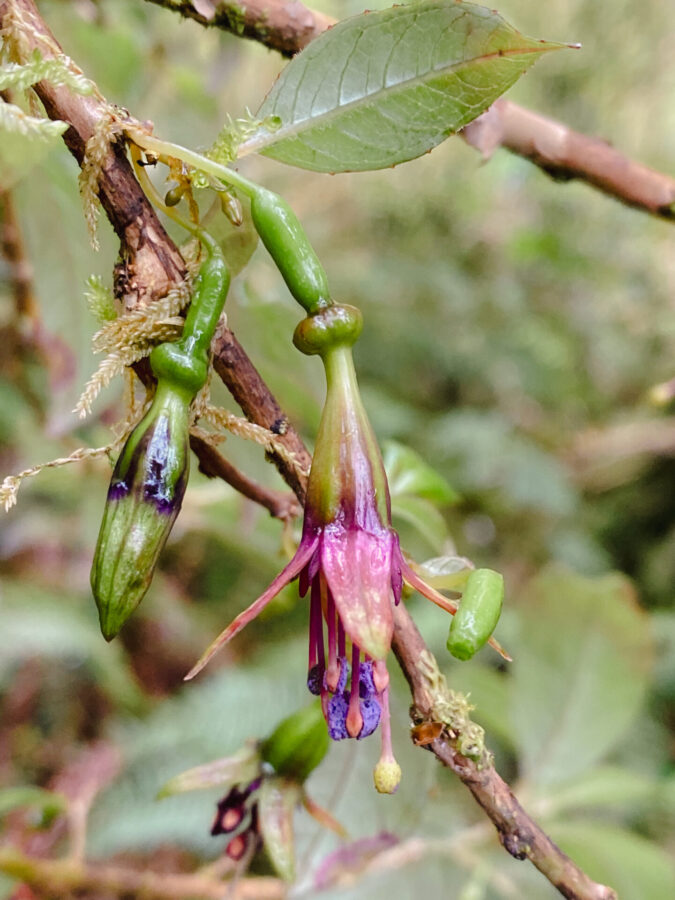
I cruised down to the Divide for the rest of my hike, admiring the waterfalls and interesting plants of Fiordland. At the end of the trail, a section of fuschia trees (the largest type in the world!) grows over the trail like in the photos below, and I was lucky enough to see their dainty purple flower buds as well.
I finally made it to the Divide, where I waited in the shelter for my bus back to Queenstown with a dozen or more other hikers. After many long minutes waiting in the cold, my transport arrived and I began the 5 hour bus journey back to Queenstown, exhausted and with a sore body, but feeling so inspired and blessed to have witnessed the breathtaking beauty along the Routeburn Track. The Routeburn Track has been one of my favorite things I’ve done in New Zealand, and I highly recommend it to anyone who likes hiking, waterfalls, and stunning mountain landscapes.
Thanks for reading!
Let me know in the comments about your experience hiking the Routeburn, and share this post with your hiker friends!
Also, if you’re thinking about hiking the nearby Kepler Track or exploring Fiordland National Park, I’ve written separate posts for those so be sure to check them out. For other Great Walks around New Zealand, I have posts for the Rakiura Track, the Abel Tasman Track, and the Tongariro Northern Circuit as well.

Leave a Reply