
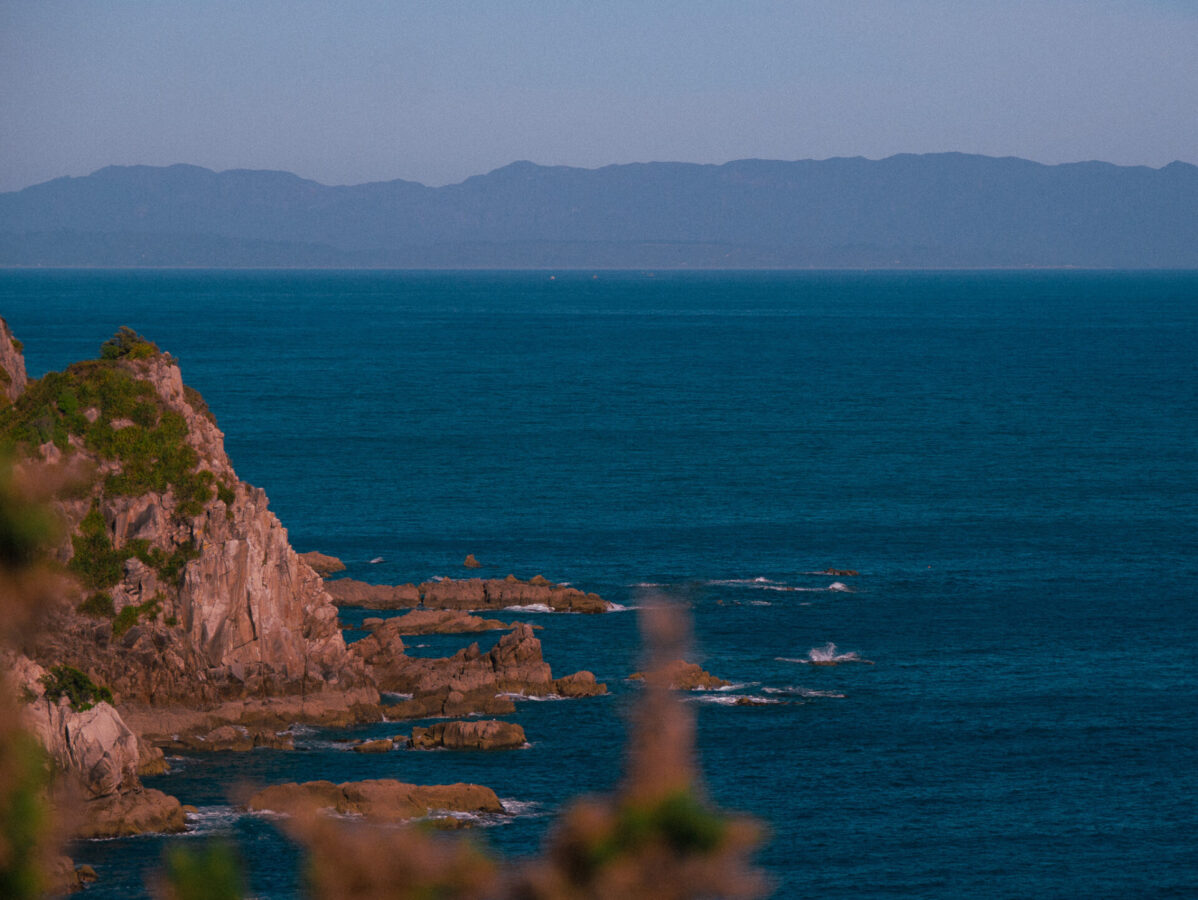
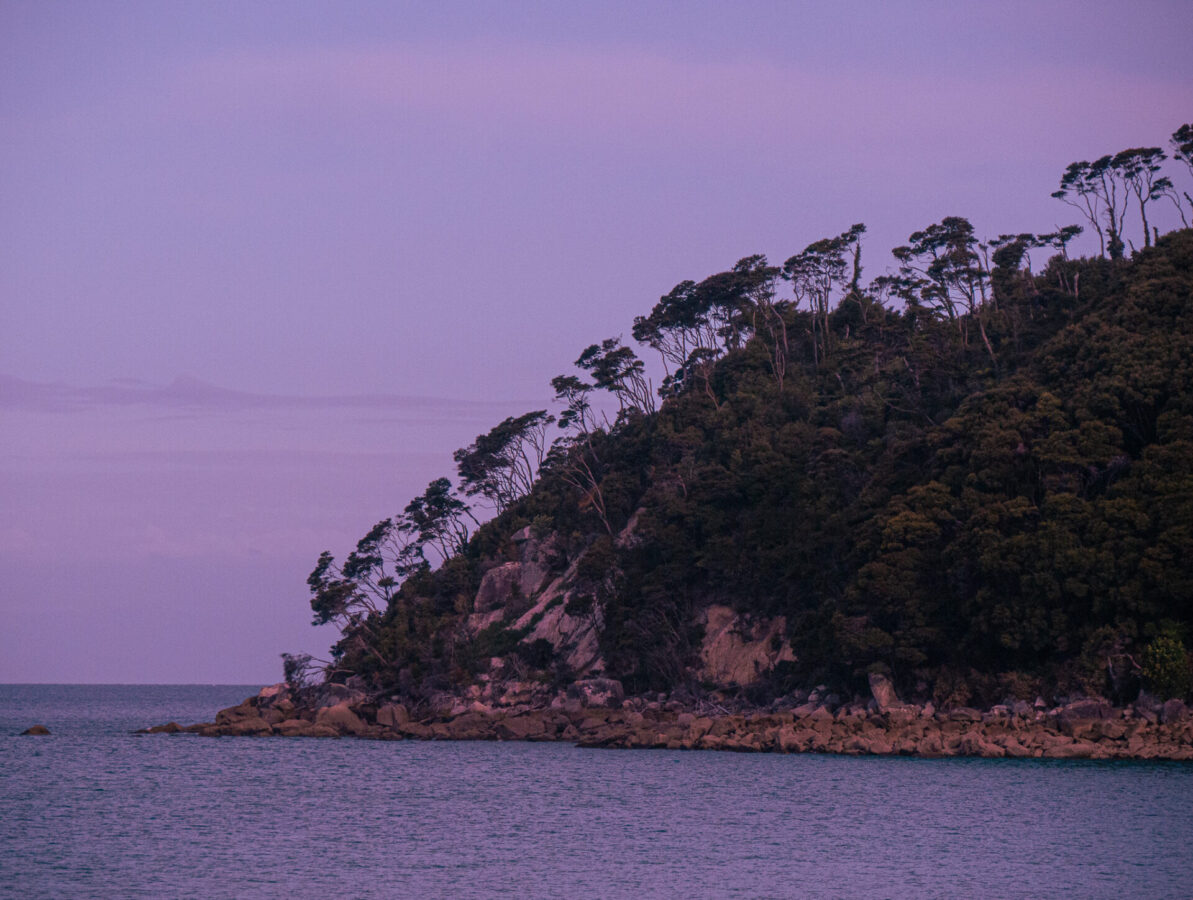
The Abel Tasman Track was my fourth Great Walk in New Zealand (after the Routeburn, the Kepler, and the Rakiura Track), and I didn’t really know what to expect except moderate hiking and stunning beaches. What I found while hiking this track over 5 days was pure gold: coastal cliffs and lush greenery meeting turquoise-colored bays, sunny weather, and beaches so beautiful that I found myself surprised by how few people occupied them.
Rather than some of the more intense elevation gain and dramatic scenery found on the Routeburn and the Kepler, this track’s mountains are smaller, the hiking itself is less strenuous, and yet the experience is just as rich as the latter two. I found that doing this hike over 5 days offered enough time for swimming breaks every day and relaxation time in the evenings with roughly 4 hours of total hiking time each day. In this post, I talk more about my experience doing this Great Walk and highlight everything you need to know about booking, transportation, and what to expect on the hike!
- What is a Great Walk?
- Information About the Abel Tasman Track
- How to Book the Abel Tasman Track
- Abel Tasman Track Transport
- Essential Packing List and Tips for Hiking the Abel Tasman Track
- My Abel Tasman Itinerary
- Day 1: Marahau car park to Anchorage Campsite (12.4 km)
- Day 2: Anchorage to Bark Bay Campsite (11.5 km plus side trips)
- Day 3: Bark Bay to Awaroa Campsite (~13.5 km including side trips)
- Day 4: Awaroa to Mutton Cove Campsite (~13 km)
- Day 5: Mutton Cove to Wainui Car Park (~10 km)
- Have Fun & Thanks For Reading!
What is a Great Walk?

“Great Walks” are multi-day hikes (some can also be bike or paddle trips) designated by the government of New Zealand as places to see exceptional natural wonders or are tracks of great historical significance. The Great Walks system was first established in 1992 in an effort to preserve and protect popular hiking trails by designating huts and campsites on the tracks and limiting the number of hikers to reduce environmental impact.
There are 10 Great Walks (though they are working on designating more in the future), and these are recognized as some of the most popular and scenic in all of New Zealand. The Great Walks are located all around the country in varying landscapes, and most of them lie within national parks. All of the tracks are designed to be done over multiple days, though there are some you can do in one day, or you can do parts of them in shorter chunks as day hikes.
Information About the Abel Tasman Track
Location: This track is located in Abel Tasman National Park at the top of New Zealand’s South Island.
Distance: 60 km, usually done over 3-5 days
Weather: This area of the country typically is sunny and warm throughout the year, especially during the summer season, but it can also rain any time.
This track is very popular year-round and can be done as a hike or kayak trip. This track lends itself well to anyone who wants plenty of swimming opportunities, at least in the summertime. Even in the winter while the weather gets colder, this track stays open given the region’s moderate climate and is still a fantastic option while some of the other Great Walks’ seasons end.
Most people do a shortened version of this hike over 3 days (from Marahau to Totaranui) and then take a return water taxi back to Marahau. Alternatively, you can also rent kayaks in the Marahau area and do the trip via water; since kayak rentals are not allowed past Totaranui, this option would be limited to 3 days. The full Abel Tasman Great Walk goes from Marahau to Wainui and while it can be done over 3 days, most hikers choose to do it over 5 days in order to get the most out of all the swimming opportunities along the coast. For the 5-day option, hikers typically pay for a return bus back to Marahau or vice versa if they started at Wainui.
Below I go into more details about bookings and transportation for the Abel Tasman Track.
How to Book the Abel Tasman Track

The following pricing structure goes for the main Great Walks season (October-April). Pricing varies during the winter months (May-September).
NEW ZEALAND RESIDENTS*:
Huts: $42/pp
Campsites: $16/pp
*If you’re international but have been living in New Zealand for at least 6 months, you can qualify for this rate with proof of utility bills or pay stubs.
INTERNATIONAL VISITORS:
Huts: $56/pp
Campsites: $24/pp
Here you can find the link to book huts and campsites, as well as additional information about the track from the Department of Conservation (DOC).
Here you can view the estimated hiking and kayaking times between different points on the Abel Tasman Track to help you plan out where to stay along the track.
Which is Better: Huts or Campsites on the Abel Tasman Track?
Personally, I found that the campsites along this track were better than the huts. For one, the campsites were sometimes in a much cooler location. For example, at Bark Bay, the campsites are along a sand bar, while the hut is set back behind an estuary in the woods. Secondly, since the weather in this region of the South Island is known to be more moderate, huts seem to be a bit redundant compared to the huts on some of the other Great Walks that are prone to lots of rain or snow (like the ones on the West Coast or in Fiordland National Park). Huts are still a great option, though, if you don’t have a tent!
Here are some pros and cons of each option, and below that I go into more detail about my personal experience camping along the Abel Tasman Track.
HUTS:
Pros: Beneficial if you want an indoor space to relax after hiking; good for getting out of inclement weather; come with flush toilets, water taps, sinks, fireplaces; swimming nearby; “summer camp” community feel; you carry less stuff (no tent); good for winter as there are fireplaces; there are beach showers at some of them
Cons: You have to share a bunk room with other people, so not much privacy or quiet; expensive; less time out in nature; unlike other Great Walks huts, there are no cooking facilities in the huts on the Abel Tasman
CAMPSITES:
Pros: Beneficial if you have your own tent; you can have your own space; most come with flush toilets & a cooking shelter with a sink; there is swimming nearby; more time outside in nature; relatively inexpensive; some have beach showers
Cons: Not a great choice if you don’t feel comfortable with the possibility of setting up or putting away tent in inclement weather or if you don’t have all the camping gear required to be self-sufficient
My Experience Camping Along the Abel Tasman Track
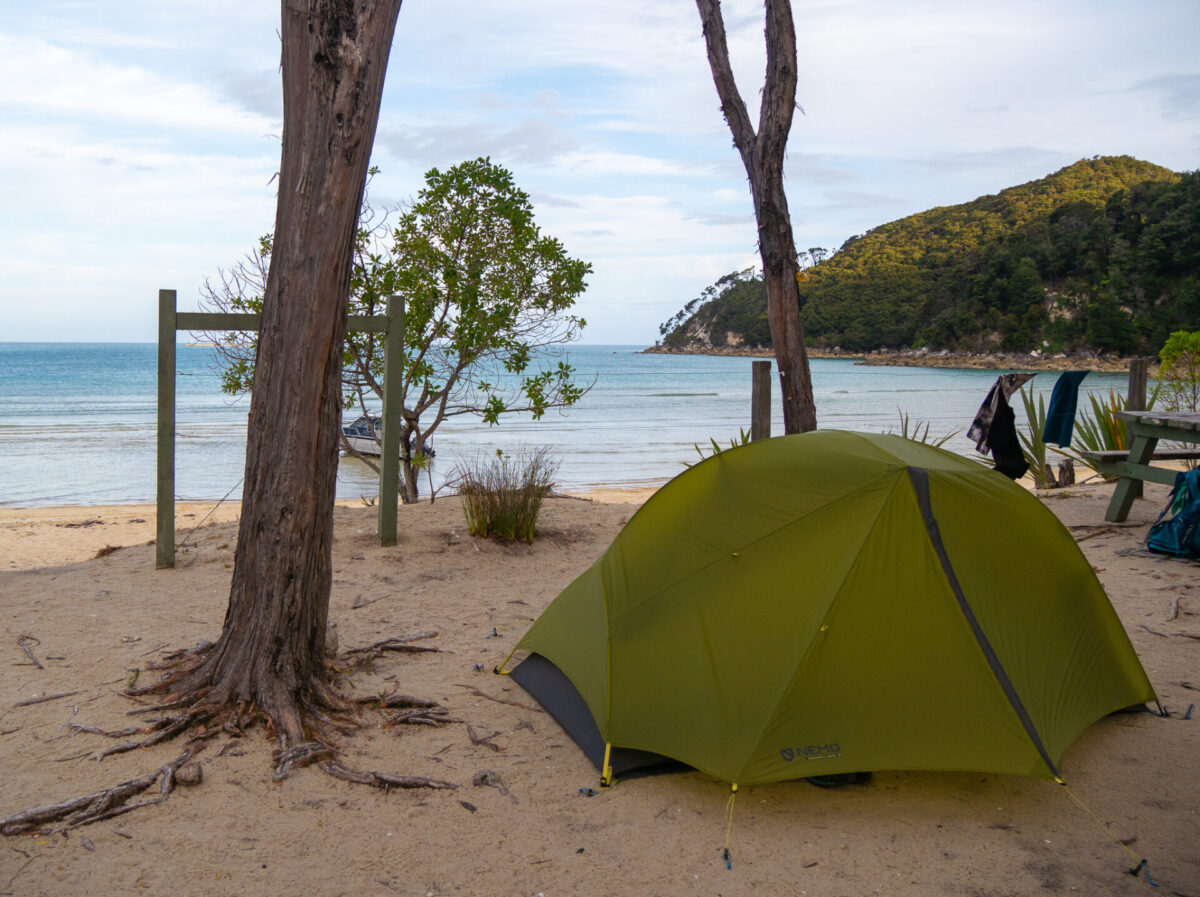
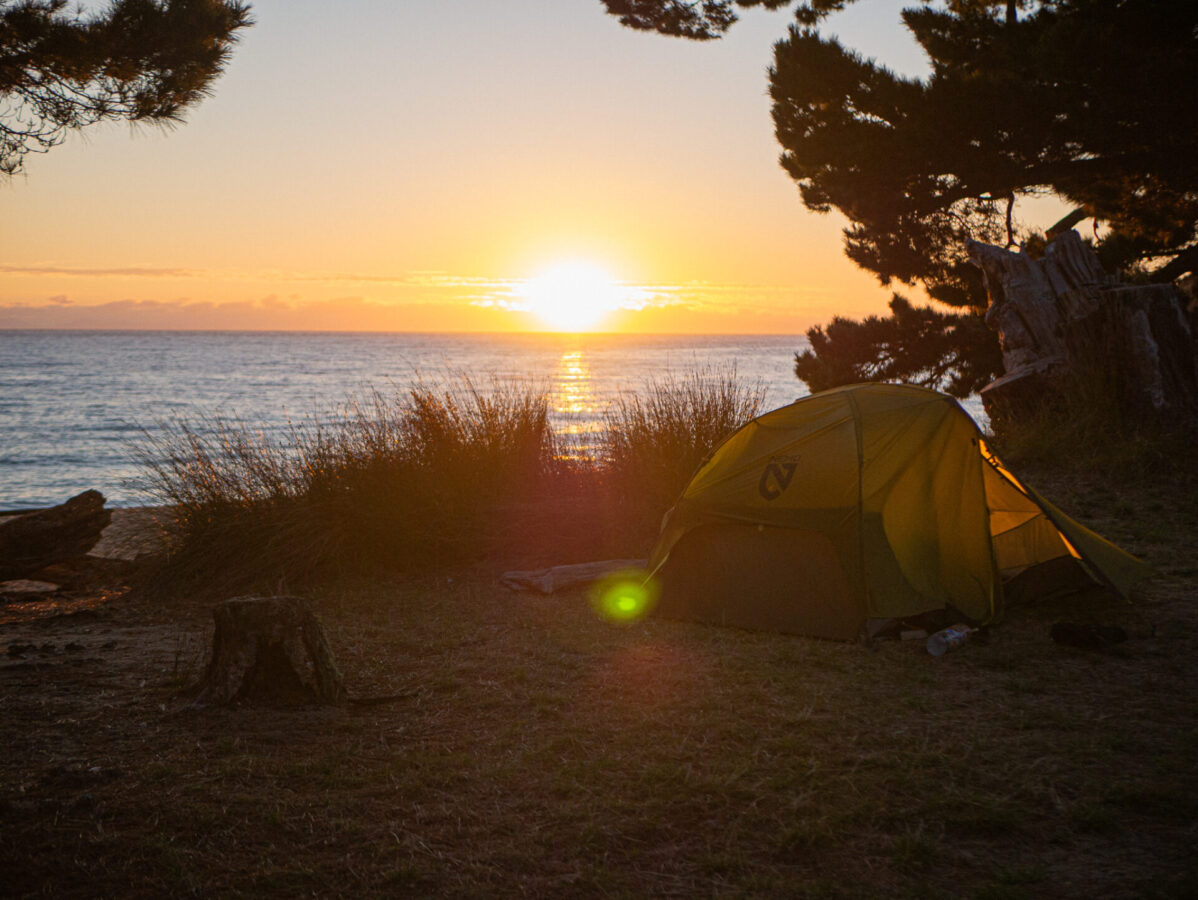
I really enjoyed camping on this Great Walk! The weather during my trip was absolutely perfect. All of the campsites are located right on the beach or they are a short walk away. A surprising feature were the flush toilets and the beach showers located at many of the campsites! There are fire rings as well, though during my trip there was a fire ban so we could not use them.
There were almost no biting insects (except at Awaroa), but don’t be fooled about the lack of pests! Wekas, one of New Zealand’s native flightless birds, are widespread on this track and love to steal hikers’ food. They have been known to wiggle into people’s unzipped tents and steal food straight out of people’s backpacks. I saw them hop onto picnic tables to swipe unattended food multiple times, at multiple campsites. In our case, one night my partner left some snacks in his front hip pocket of his backpack, which we left outside. We woke up in the morning to find that a weka had unzipped (!!!) the pocket, pulled out the snacks and ate them, leaving only the empty ziplock baggie with a punctured hole as evidence.
Since there are only four huts (located at Anchorage, Bark Bay, Awaroa, and Whariwharangi), if you plan to stay only in huts you won’t have to make many decisions (if any) about where to stay as they are in convenient locations along the track. However, there are tons of campsites dotted along the track that it can be hard to choose which ones to book if you are planning to camp!
Below are a list of the campsites we stayed at and a few that we hiked through. From what I saw, the campgrounds were all so beautiful, perched on some incredible beaches, and you can’t really go wrong with any of them (with the exception of Totaranui, which I detail below). Please note that we picked these campsites in large part because they were conveniently placed for our hiking schedule, allowing roughly 4 hours of hiking each day. There are many different options to suit different hiker or kayaker needs, but these we found to work best for us over a 5-day trip.
Campsites we stayed at:
Anchorage
The site at Anchorage is huge, with plenty of campsites and a hut. Due to its close proximity to the starting point of the Abel Tasman track at Marahau, this is a popular campsite for large groups, those who traveled by boat, and kayakers. This was by far the busiest campsite we stayed at, and for some the amount of people might be a deterrent. For us, we loved both its beach and spacious campground that felt sort of like summer camp. Anchorage campground also has more amenities, including plenty of picnic tables, lots of shade, a big outdoor cooking shelter, and a beach shower.
Bark Bay
The quaint Bark Bay campground is sooo lovely. The view coming down from the hills is spectacular, and the campsites take up a slot of sandbar that separates the bay from the inlet. There is a hut here, but it is perched back in the woods behind the estuary, so the campground is definitely in a cooler spot being right on the sand bar. There is a small cooking shelter and some picnic tables, and of course a beautiful beach with a great view. This was by far my favorite campsite on the whole track.
Awaroa
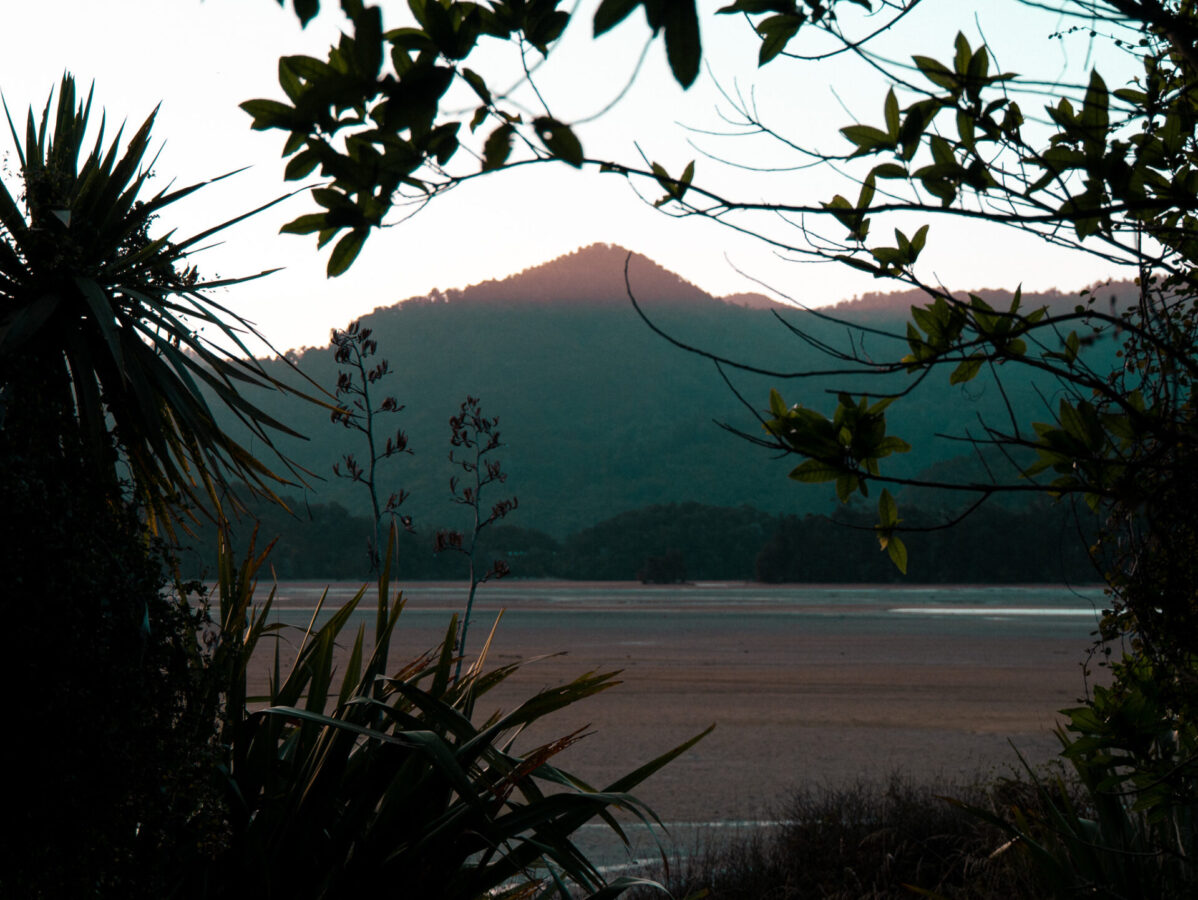
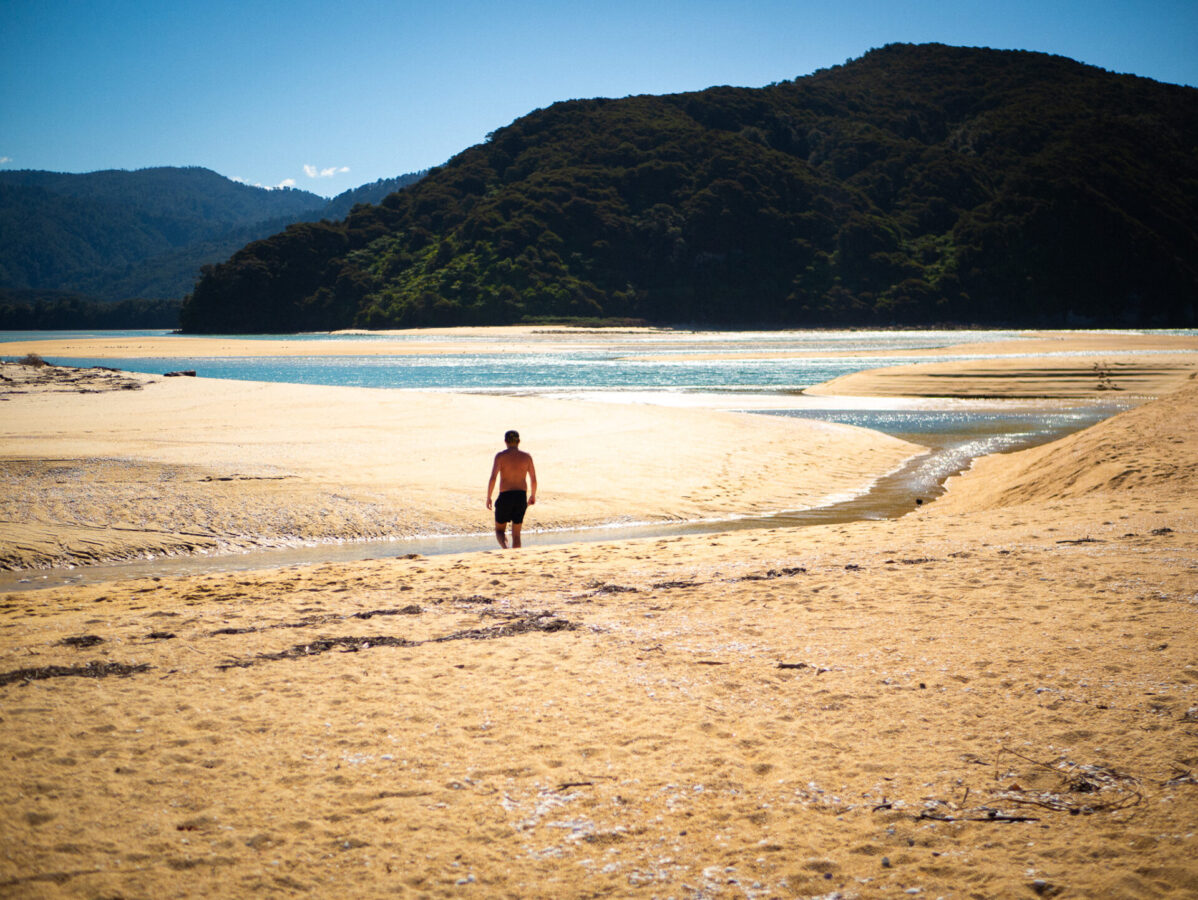
Awaroa is a convenient place to stay if you are hiking Marahau to Wainui, as it sits right next to the Awaroa Inlet, the biggest low tide crossing on the whole track. Since there are no high tide track options for this inlet, it’s important to plan your hike around the tides. The best bet is to cross it early in the morning or later in the evening, closest to whenever low tide occurs. Since we planned to hike across this inlet early in the morning, we felt that a sleep at the Awaroa campsite was worth it. Awaroa has both campsites and a hut as well as a cooking shelter and an outdoor shower. This was the only campsite that had persistent biting bugs (mostly mosquitoes) on the whole Abel Tasman Track. The campsite isn’t much to look at, but the inlet is cool and it’s very close to the famous Awaroa People’s Beach, aptly named after it was crowdfunded by Kiwis in 2016 to keep it public.
Mutton Cove
Mutton Cove is a cute little quaint campsite close to the Wainui end of the track. There weren’t many facilities here (no cooking shelter, only pit toilets, and no shower) but it was beautiful, quiet and remote.
Other campsites we saw but didn’t stay at:
Onetahuti Bay
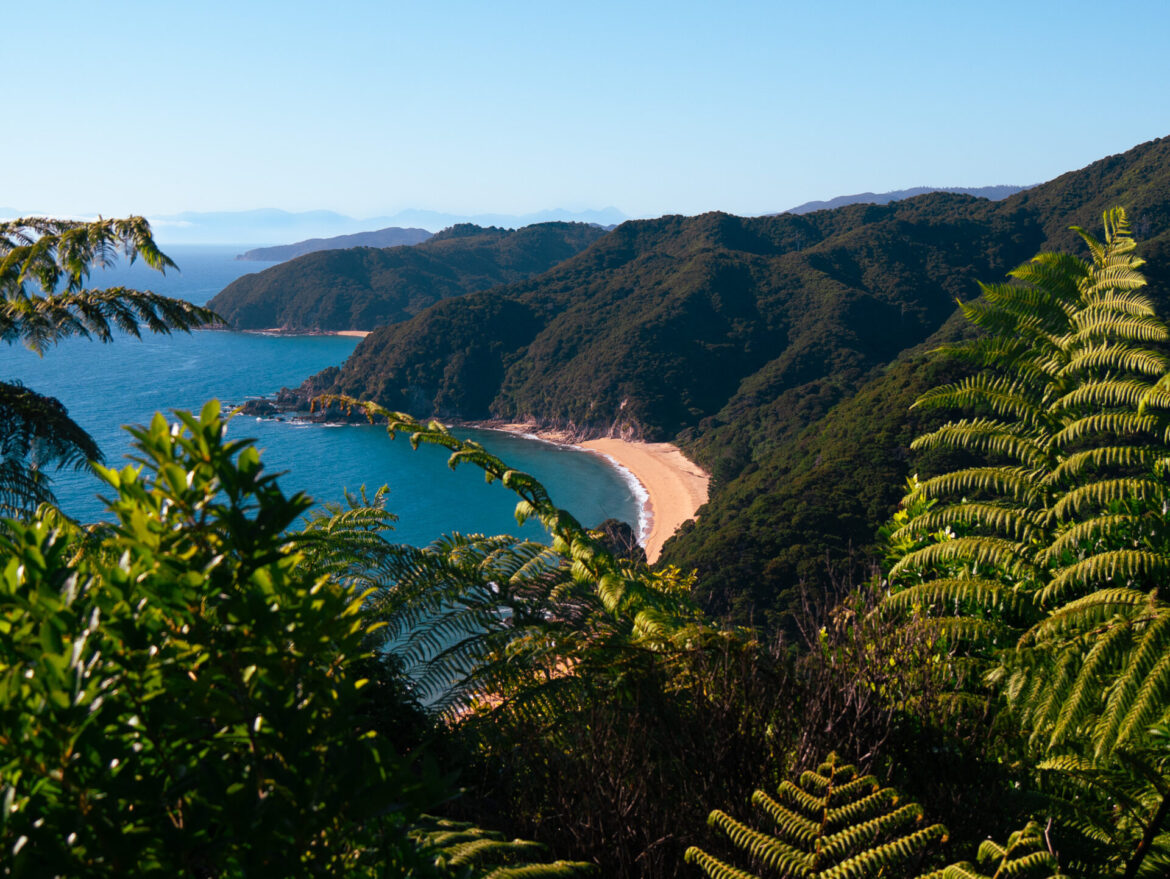
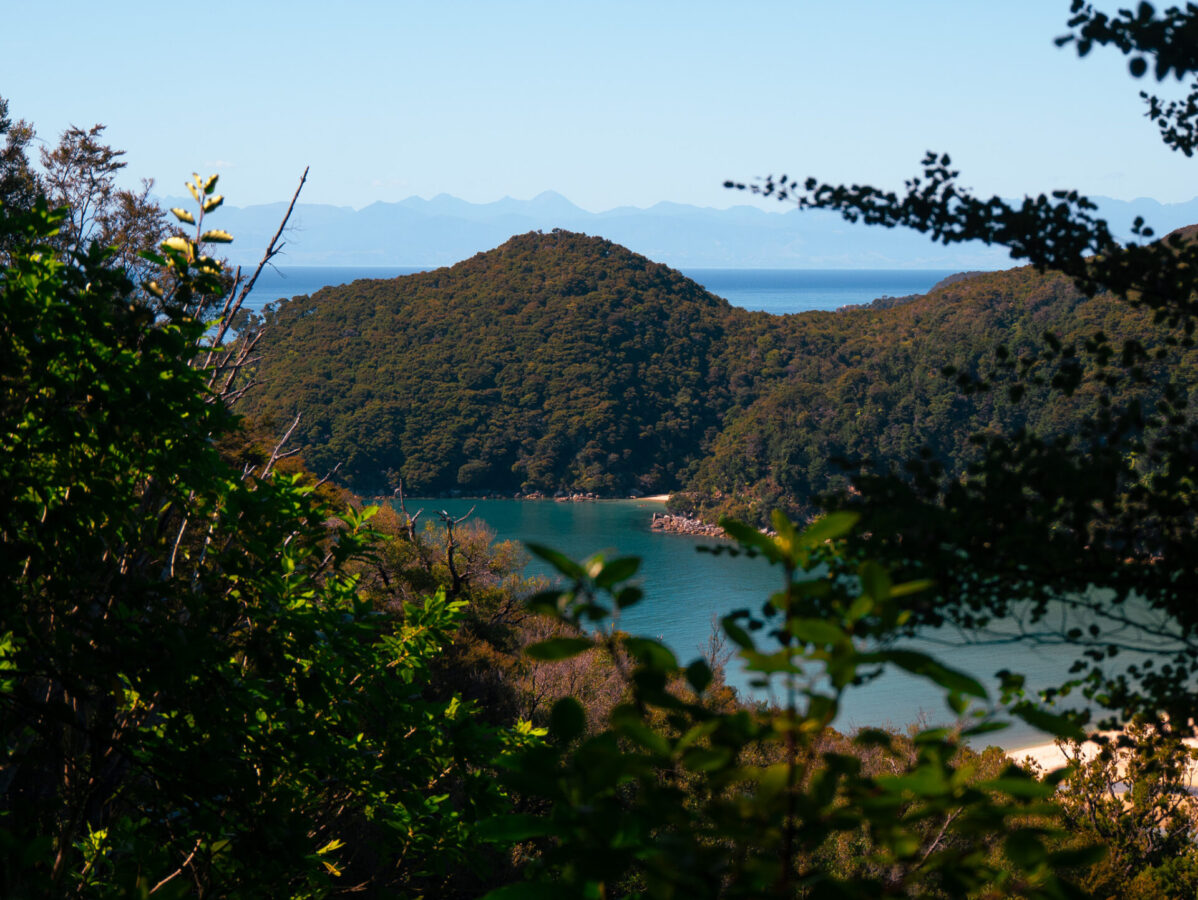
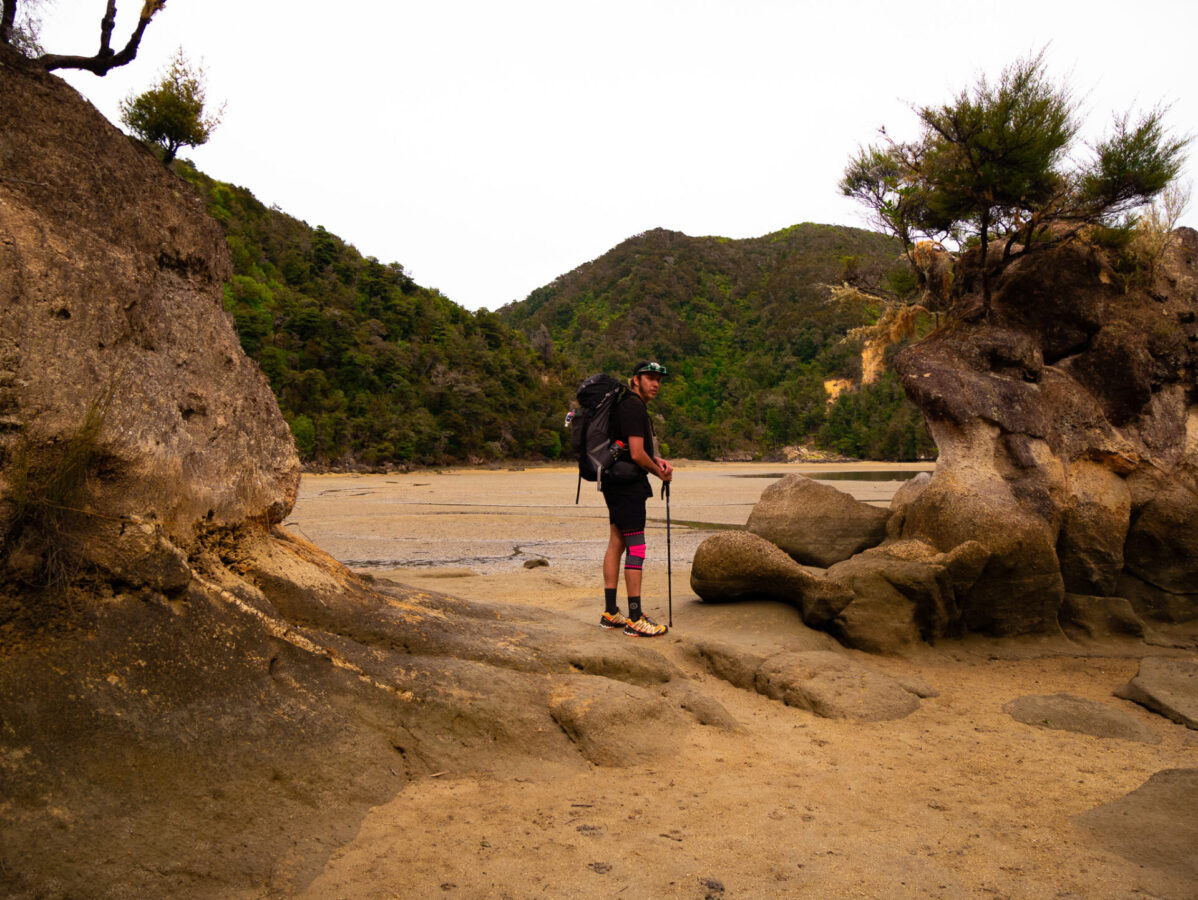
Onetahuti was an awesome spot! We stopped here midday on day 3 for some swimming and we were so delighted! Firstly, coming down to this beach you get a great view of the turquoise bay from the hills (if you are hiking from the south). When we got down and went swimming, on the right hand side of the beach there are some caves and rock formations to explore. The campsite is directly behind the beach. The site is across from Tonga Island and is located next to the Tonga Island Marine Reserve, so it’s likely that staying here will offer great chances to see some marine life. Even if you don’t camp here, I recommend this spot at least for a swim break!
Totaranui
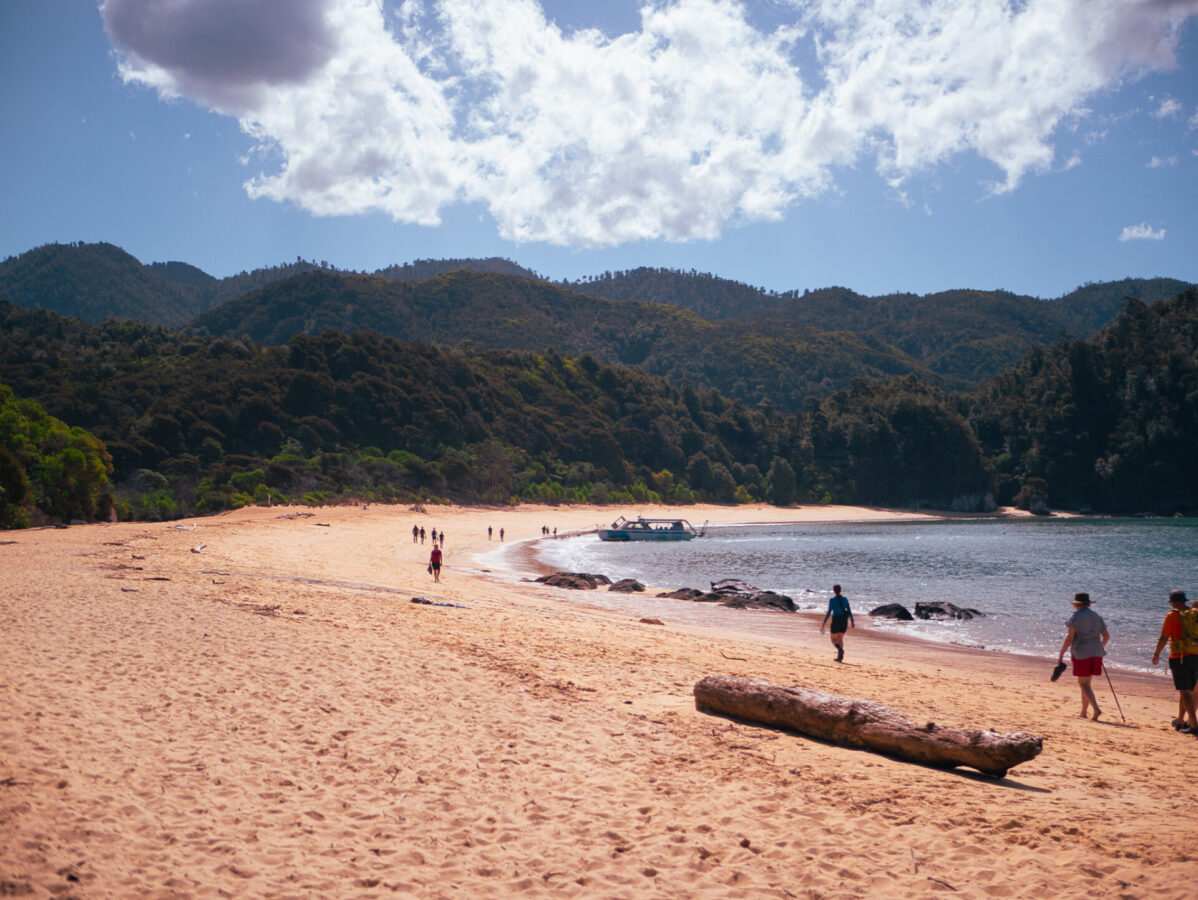
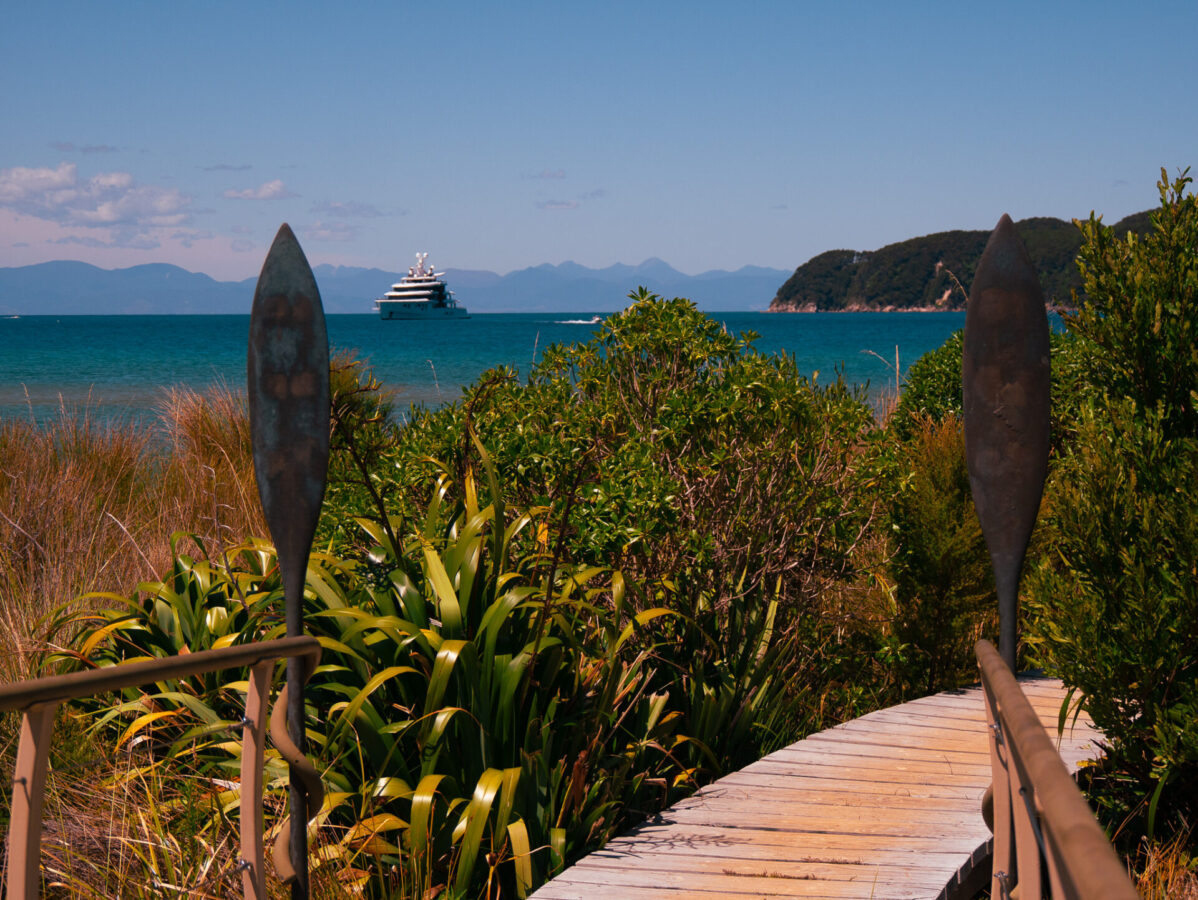
We didn’t stay at Totaranui, and when we passed through it I was very thankful that we didn’t. While Anchorage was pleasantly busy, Totaranui felt industrial in comparison. Totaranui is a main port of entry into Abel Tasman, and has a huge campground for people who are just looking to camp near the beach for a few days. Totaranui is also the place where a lot of hikers choose to finish their hike after 3 days and take a water taxi back to Marahau. It might be convenient for some people, but there were far too many people for my liking after three days in the woods and on mostly secluded beaches.
Anapai Bay
This one is close to Mutton Cove and is a viable alternative. I personally liked the setup of Anapai Bay better than Mutton Cove, as the campsites were tucked in the trees, but it still offers great views and access to a nice beach. This one is about the same size and has roughly the same amenities as Mutton Cove.
Abel Tasman Track Transport
Kayaking
If you’re kayaking the Abel Tasman instead of hiking, there are a number of operators in the area who offer rentals. For anyone renting, the rental companies don’t allow kayaks to go past Totaranui, so the trip would be limited to three days.
Return Bus
For the five day hike, most people opt to get a bus pickup, which brings hikers back to their cars at the other car park. So for example, if you start at Marahau, the bus will pick you up at Wainui and bring you back to Marahau or vice versa. Alternatively, you could park your car at the end point and take a bus back to the starting point. In this instance, you will do the bus first, then your car will be ready for you on the other end!
For this option, do be careful with leaving valuable belongings in your car. One of my friends from Queenstown got her car broken into (her back window smashed) while she was on the hike because of some camping gear she left in view.
It is better to park your car at Marahau, as this car park is bigger and busier, whereas Wainui is smaller and more remote so an easier target for theft. In either case, be sure to hide your valuables as theft has been known to happen at both car parks.
I booked mine with Heaphy Bus (which also does transport for the nearby Heaphy Track), but there are some other companies in the area that offer transport as well.
Roundtrip Bus
If you don’t have a car or don’t want to leave your car in one of the trail parking lots, you can also do a return bus where you can get dropped off and picked up at the end of your hike and brought back to your car.
Return Water Taxi
Many people like to do the return water taxi. I’m sure this is way more scenic than the bus, but this option is only suitable for people who do a 3-day hike (or less) as the water taxis do not go past Totaranui. There are a few companies in the area that offer this service.
Essential Packing List and Tips for Hiking the Abel Tasman Track
What to Pack
- 40-60 Liter backpack
- 3 season sleeping bag (if hiking in winter)
- 3 season sleeping pad (if camping in winter)
- 3 season tent (if camping in winter)
- backpacking stove, fuel canister and lighter
- cutlery, cup, bowl, pot
- enough food and snacks to last for your trip (plus a little extra just in case)
- headlamp
- warm weather clothing (quick drying t-shirt/tanktop, quick drying shorts)
- wet weather clothing (waterproof jacket, water resistant and quick drying and/or waterproof shorts)
- cold weather clothing (if hiking in winter)
- extra set of clothes to sleep in and camp shoes (sandals or crocs work well)
- toiletries
- first aid kit/medications
- water bottles or water bladder (at least 2 liter capacity) plus a water filter
- phone and portable phone charger
- hiking boots or trainers (waterproof and with good traction)
- beach sandals or crocs
- microfiber towel and/or sarong (for laying out on the beach/also works as a towel)
- bugspray, wasp sting treatment & lots of sunscreen
- poop shovel and toilet paper (JUST IN CASE)
- optional: bathing suit
- optional: hiking poles, headphones, book or journal/pen, camera
Safety
This track is well marked and maintained with plenty of places to stop and rest, take a bathroom break or fill up water if needed. With that being said, accidents and emergencies do happen so here are a few tips to minimize any problems on the track:
- Bring at least 2 liters of water every day (there are water tanks at every hut and campsite).
- Be sure to filter any water you take while on the trail as none of it is treated.
- Keep your phone charged to use as a GPS (without wifi), in case of emergencies and of course as a camera! My favorite GPS app to use is Maps.me which allows you to download GPS maps for free to use offline. This has helped me on many trails and I can’t emphasize enough how important this is to have on a hike in case you get lost.
- Wear appropriate hiking shoes with grip traction, comfort and stability.
- Bring extra food and snacks. For example, I met a group on my bus from the Routeburn Track back to Queenstown that got stuck on the Milford Track for an extra day due to flooding. While they stayed at their hut they had to ration out their food so they had enough to finish the rest of the hike. You just never know, so bring that bit of extra food.
- Tell people where you’re going and what your itinerary is!
Logistical Tips
Awaroa Inlet Tidal Crossing: There are a few tide crossings along this track. However, the only one you need to worry about is the Awaroa Inlet, which is the only tide crossing without an alternative trail to use during high tide. This inlet can be crossed only 1.5 hours either side of low tide, so you will have to plan your day around when the low tide is. For most people, this means planning to start your hike from Awaroa early enough in the morning (if hiking north towards Wainui). For hikers going south towards Marahau, alternatively you could hike across later in the evening and stay at Wainui for the night. The Department of Conservation keeps updated tide times and these tables should be consulted when planning your trip.
Other Tidal Crossings: The other tidal crossings (Torrent Bay and Bark Bay) have alternative high tide tracks so you don’t need to stress about any of the others. However, the high tide tracks do take longer so if you want to keep your hike short, you can consult the tide tables and plan your hike around them. The Torrent Bay high tide track adds an additional 1-1.5 hours onto hiking time and the Bark Bay high tide tracks adds about 20 minutes of hiking time.
Swimming: I highly recommend leaving enough time in the day for swimming breaks! I planned our hike so that we could take midday swimming breaks at the various beaches we hiked past, and it was such a sweet little treat everyday. We also were able to go swimming in the evenings at most of our campsites, too. This was with roughly 4 hours of hiking each day. You can pack a bathing suit for swimming, but I just went swimming in my sports bra and underwear so that I didn’t have to change multiple times a day. This allowed me to be more spontaneous with where we decided to go swimming.
Take a Break at Awaroa Cafe: On our third day en route to Awaroa People’s Beach and Awaroa campsite, we stumbled upon this cafe which serves delicious pizza and local beer and wine. They have a nice outdoor seating area with picnic tables and bean bag chairs. We decided to stop here for a late lunch. We spent a couple hours here devouring pizza and drinking beer, and it was a spectacular break from our hiking. I highly recommend stopping here if you have the chance.
My Abel Tasman Itinerary
Day 1: Marahau car park to Anchorage Campsite (12.4 km)
Once we crossed the bridge from the visitor’s center at Marahau, the views began immediately! We hiked up and down the hills for about 4 hours, passing by a few beaches, before reaching our beautiful site at Anchorage for the night. The views from day 1 were spectacular, but they were just a teaser for the rest of the trip.
At the time of our hike, it was cicada season and there were beautiful bright green cicadas humming their songs and buzzing around. I think they must not have great eyesight because we both got whopped in the face a couple times by these buggers, so if you go mid summer you may experience the same. Otherwise, they are harmless and pretty to look at.
Day 2: Anchorage to Bark Bay Campsite (11.5 km plus side trips)
Torrent Bay Inlet Crossing Mayhem
On day 2, we faced our first inlet crossing. Originally, we weren’t planning on crossing the inlet because we left the campsite too late for the suggested crossing times (it’s only safe to cross 1.5 hours before and after low tide), but we ran into a hiker on the way there who said it was still good to go. Since we thought it would be better to cut the hike down by an hour or so, we went the inlet route instead of the high tide track.
Totally inexperienced in how quickly these bays fill up after low tide, we got about halfway across the inlet when we came across a deeper section that was about waist high with water already. We tried to cross it, but I was unable to get all the way across without soaking the bottom of my backpack. My partner crossed no problem, but he is over 6 feet tall and has longer legs than me.
So instead we panicked a little bit because we didn’t want to have to walk all the way back and take the high tide track after we had come this far. At this time, we could see the water line moving further inward with every second. (It’s wild to watch it happen! It fills up so fast!) I thought about carrying my backpack high above my head while crossing this deeper section of the inlet, but I was afraid of dropping my pack in the water and soaking everything!
This was a time when having an offline GPS map saved our asses. (If you don’t have one, you need to! They come in very handy for times like these.) After looking at the trail on my GPS map, I could see that the high tide track followed the edge of the treeline next to the inlet, so instead of turning back we beelined it for the forest quickly before anything else in the inlet became too deep for us to cross. Within a few minutes of reaching the treeline, we found the trail and continued hiking along the high tide track.
Side Trips: Cleopatra’s Pool & Cascade Falls
At the end of the high tide track we came across a side trail to Cleopatra’s Pool. We meandered through the trail and found a river with big bolders and lovely pools for a quick swim. We spent a little while here climbing on the rocks and exploring the various pools here. I definitely recommend this side trip!
Cascade Falls was a different story. The trail was steep and not well maintained, so the hike up toward the falls felt treacherous. The waterfall itself wasn’t that impressive and we felt the hike up to it wasn’t totally worth the effort. If you do this side trip, it may be worth leaving your big packs at the bottom of the trail to collect on your way out.
After coming back down, we continued onward towards Bark Bay. We stayed in the forest for most of the rest of the hike, which offered impressive views here and there. When we arrived in Bark Bay, we were delighted by this quaint campsite located right on a sandbar in between Bark Bay and the Bark Bay Inlet.
Day 3: Bark Bay to Awaroa Campsite (~13.5 km including side trips)
Day 3 was probably my favorite day on the whole track! The views were epic, the swimming spots were fantastic, and there was even an unexpected little pitstop for pizza and beer.
We started our day by taking the high tide track from Bark Bay to the other side of the inlet. This only added about 20 minutes to our hiking time, so we weren’t stressed about waking up early enough to do the inlet crossing there.
Until we arrived at Onetahuti Beach, we cascaded between thick forest and the edge of the cliffs, where we got gorgeous glimpses of the surrounding sea. Around midday, we stopped at Onetahuti Beach for some lunch and a swim. This beach is great for exploring, as there are some caves and rock formations near the beach that you can swim out to (or possibly walk to during low tide).
After hopping on the bridge from Onetahuti Beach, we continued onward through the trees. Later in our hike, we started seeing signs for the Awaroa Cafe, which serves beer and pizza. We decided to stop there for a middle of the hike treat. We each had a few beers and a pizza. It’s a lovely little spot outside in the shade, with bean bag chairs and picnic tables. I highly recommend stopping here if you have the chance.
From there, we took a short cut over to the famous Awaroa People’s Beach (there were signs from the bar). We made it to the beach within 20 or so minutes and spent a while swimming and exploring, both still a little tipsy from the beers. This is such a lovely stretch of beach and it’s a great side trip on the way to Awaroa campsite.
We crossed the inlet and made it to our campsite pretty quickly from the Awaroa People’s Beach. At this time during the day, the tides were low enough for us to cross but I imagine that during high tide, hikers would have to hike back and go around the coastline to reach the hut and campsite at Awaroa.
Day 4: Awaroa to Mutton Cove Campsite (~13 km)
Early the next morning, we skipped breakfast and decided to cross Awaroa Inlet early so that we wouldn’t get caught in high water like we did at Torrent Bay. The crossing took about 30 minutes and along the way there were wading birds and hundreds of little sand crabs that scuttled away with every step we took. This early in the morning, the scene was so peaceful and serene.
On the other side, we sat down to drink some coffee and eat breakfast. Once caffeinated, we began hiking up through the woods. We mostly stayed in the trees, coming out a couple times to see the ocean, and then weaving back inward until we reached Totaranui.
This was my least favorite spot on the whole track. There is a main road that leads here, with a massive campground for those on a weekend holiday. This is also the main water taxi exit point for hikers on the Abel Tasman, and so this spot is just full of people. Because we had been on mostly secluded beaches for three days, this section felt jarring and I hiked to escape as quickly as possible.
Further past Totaranui, we continued hiking through the hills until we reached Anapai Bay, a cute quaint campsite tucked in the trees next to the beach. It was a tiny campsite with a few picnic tables and shady trees next to the sand, with rocky cliffs on one side of the beach. We followed the stretch of sand until we reached the nearby Mutton Cove, where we set up our tent for the night.
Day 5: Mutton Cove to Wainui Car Park (~10 km)
This day was probably the least scenic of all 5 days; however, we were still able to see some cool things! First, we hiked over to separation point, where you can see the lighthouse there as well as views of Farewell Spit, which is the northern most point of the South Island.
We hiked through the hills for the remainder of the day, with a few views poking through the trees here and there. When we arrived at the Wainui car park, we waited in the shade for our return bus back to Marahau, both exhausted but totally satisfied with this beautiful journey through Abel Tasman.
Have Fun & Thanks For Reading!
I hope you absolutely love the Abel Tasman Track! For further reading on other Great Walks in New Zealand, I’ve written up posts for the Routeburn, Kepler, Rakiura, and the Tongariro Northern Circuit so be sure to check those out.
Drop a line below with any questions or to let me know how your hike went! And be sure to share this post with your hiker friends. 🙂

Leave a Reply