
As a lover of hiking and mountain scenery, I was determined to complete some of New Zealand’s famous Great Walks during my year-long working holiday. Because I was living in Queenstown, I was spoiled with easy access to the Southern Alps mountain range and many amazing hiking trails in the area, including Fiordland National Park’s Kepler Track.
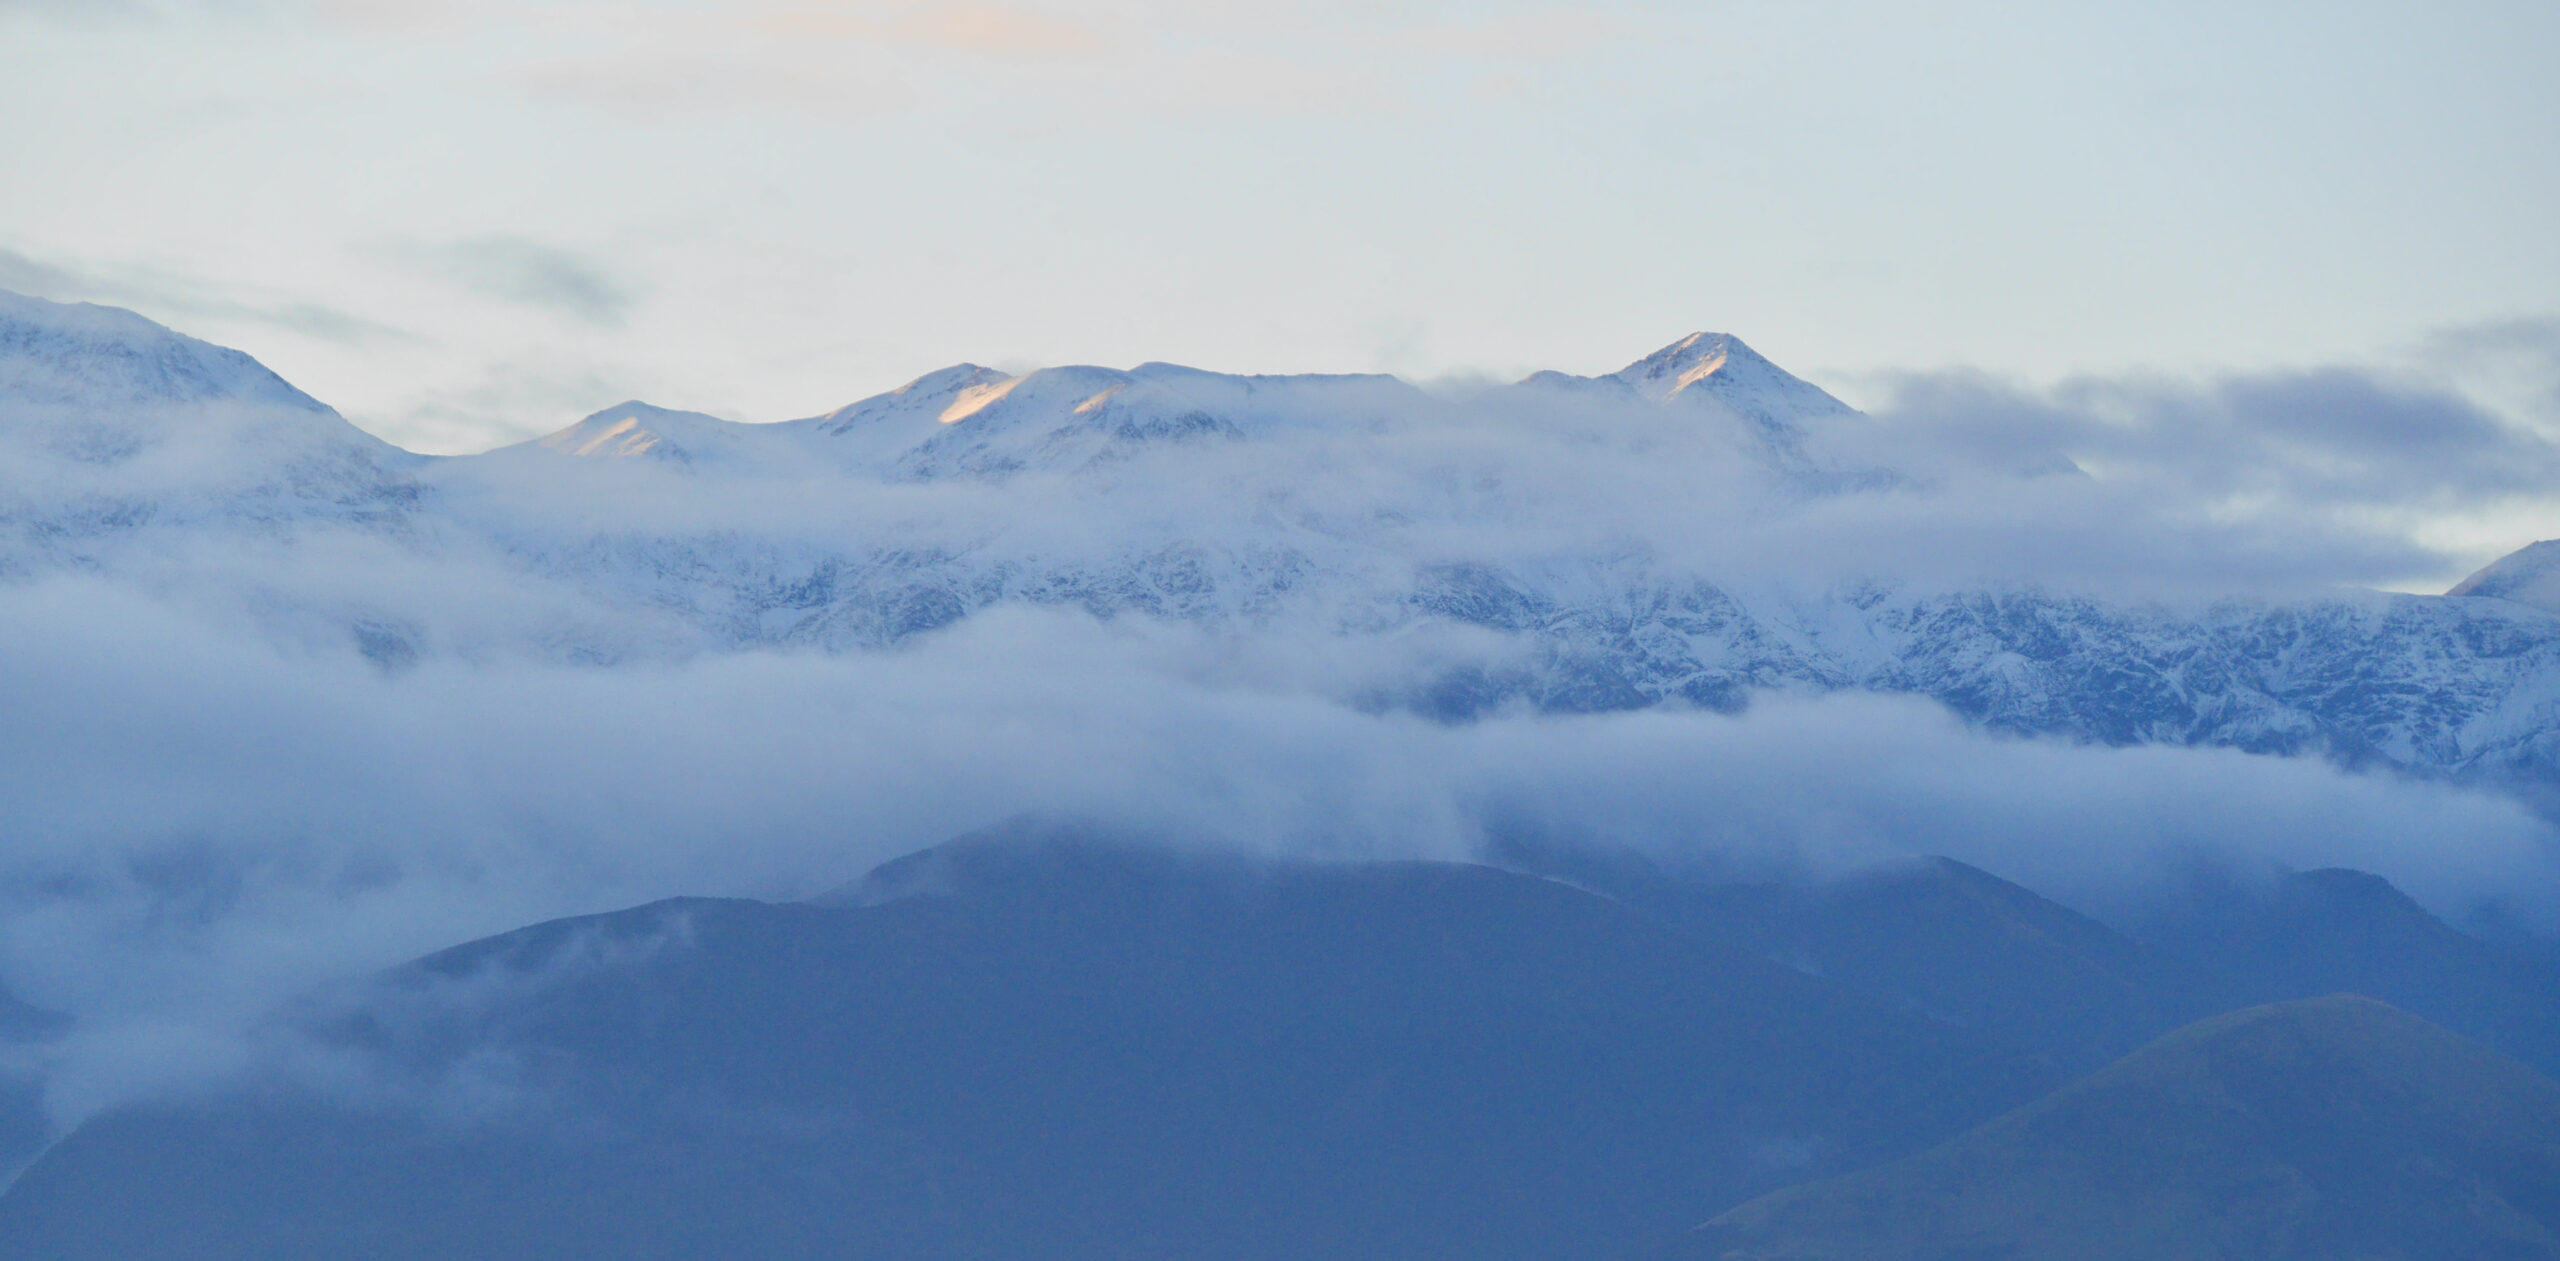
Located on the southern tip of the South Island, New Zealand’s largest national park boasts of jaw-dropping mountain scenery, endless waterfalls and turquoise rivers, and most notably the magical glacier-carved fiords that give this park its name. Because it’s so remote, Fiordland National Park is known to be a great place to spot some rare and fascinating bird species, such as the kea, the kiwi, and the little blue duck – all endemic to New Zealand and sadly on the endangered list.
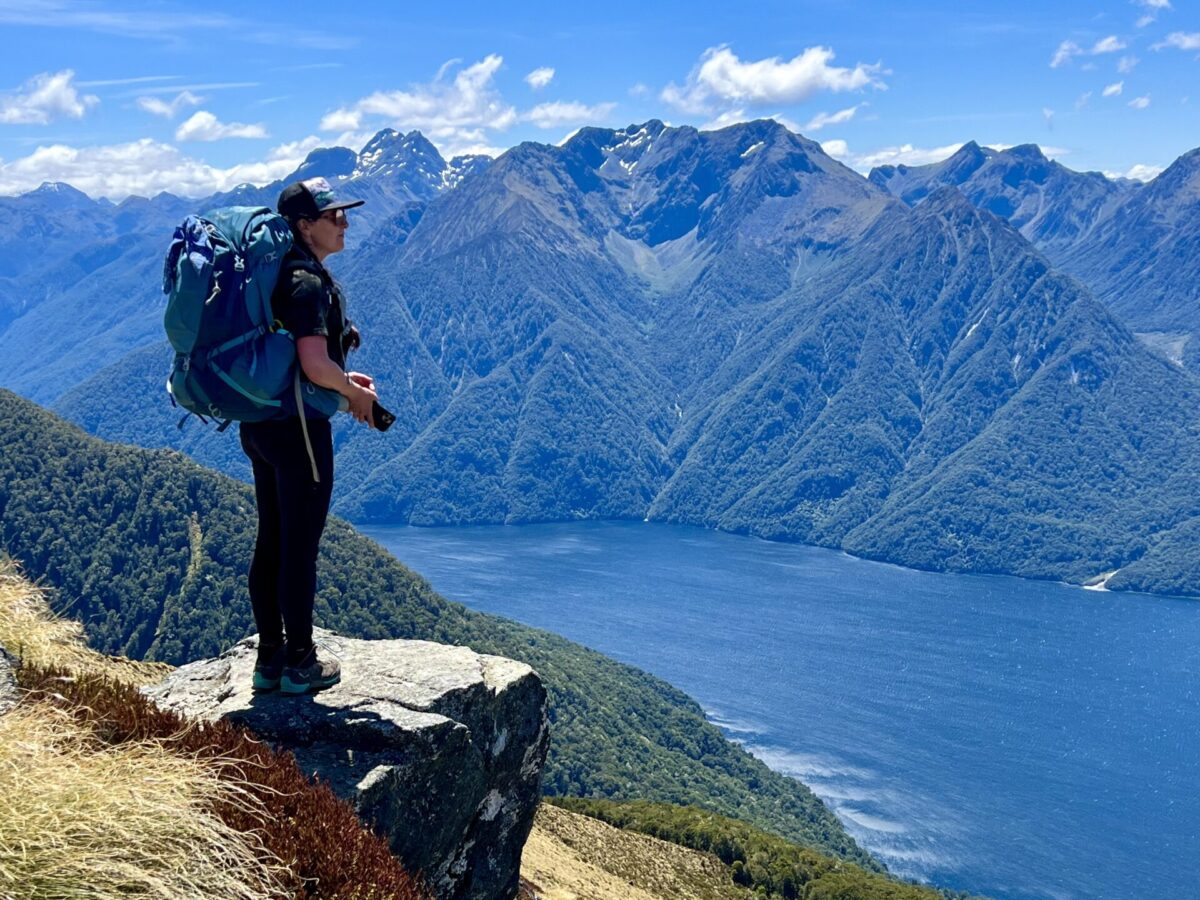
After exploring Fiordland National Park, including the world-famous Milford Sound by boat and then hiking the popular Routeburn Track, I fell in love with this part of New Zealand and wanted to go back for more. This time, I brought my friend Kevin along as we took on the 60-kilometer Kepler Track. My expectations were high after getting glimpses of the other stunning scenery in Fiordland National Park, and I was further enchanted by the beauty of the Kepler Track.
This post goes into all the nitty gritty details about this track: how to book, safety & packing tips, and my personal experience for any of you thinking about tackling this incredible Great Walk.
What is a Great Walk?
Great Walks are multi-day hikes (some can also be bike or paddle trips) designated by the government of New Zealand as places to see exceptional natural wonders or are tracks of great historical significance. The Great Walks system was first established in 1992 in an effort to preserve and protect popular hiking trails by designating huts and campsites on the tracks and limiting the number of hikers to reduce environmental impact.
There are 10 Great Walks (though they are working on designating more in the future), and these are recognized as some of the most popular and scenic in all of New Zealand. The Great Walks are located all around the country in varying landscapes, and most of them lie within national parks. All of the tracks are designed to be done over multiple days, though there are some you can do in one day, or you can do parts of them in shorter chunks as day hikes.
Information About the Kepler Track
Location: This track is located in Fiordland National Park and can be started right from the town of Te Anau.
Distance: 60 km loop track, usually done over 3 or 4 days.
Elevation gain: Just over 2000 meters.
Weather: This area of NZ receives a lot of rain, so expect some showers and clouds intermixed with sunny days even in the summer. In the shoulder seasons, expect more rain, snow, and cold weather.
How to Book the Kepler Track
All of the Great Walks have various campsites or huts that hikers can stay at throughout their time on the tracks, which generally need to be booked well in advance for the main summer season. Bookings for the year open up every April or May. Some of the tracks sell out very quickly, such as the Milford Track (which sold out in 4 hours in 2023) and the Routeburn Track. Like the latter two, the Kepler Track is one of the more expensive Great Walks to book and it is very popular, so if you are thinking about doing this track, make sure to plan well in advance.
In addition to booking huts/campsites, some people choose to book transport for the Kepler Track as well, though this isn’t necessary if you have a car because it’s a loop track.
See more about booking huts or campsites and transport below.
Kepler Track Camping/Hut Options

Most hikers choose to do this track clockwise over three or four days. There are three huts and two campsites located along this 60 km track. Only one location (Iris Burn) has both a hut and a campsite. The others (the Luxmore and Moturau Huts and the Brod Bay campsite) are all spaced out at different sections along the track, so you have a number of options to choose from in planning out how you would like to hike this track.
The following pricing structure goes for the main Great Walks season (end of October-April). Pricing varies during the winter months (May-mid October).
NEW ZEALAND RESIDENTS*:
Huts: $68/pp
Campsites: $21/pp
*If you’re international but have been living in New Zealand for at least 6 months, you can qualify for this rate with proof of utility bills or pay stubs.
INTERNATIONAL VISITORS:
Huts: $102/pp
Campsites: $32/pp
Here you can find the link to book huts and campsites, as well as additional information about the track from the Department of Conservation (DOC).
Which is Better: Huts or Campsites on the Kepler Track?
There are pros and cons to each option, outlined below:
HUTS:
Pros: Beneficial if you want an indoor space to relax after hiking; good for getting out of inclement weather; come with flush toilets, gas stoves, water taps, sinks, fireplaces; swimming nearby; “summer camp” community feel; you carry less stuff (no tent, no need for gas canister or stove)
Cons: You have to share a bunk room with other people, so not much privacy or quiet; expensive; less time out in nature
CAMPSITES:
Pros: Beneficial if you have your own tent and hiking stove; you can have your own space; come with pit toilets, a cooking shelter with a sink, and a water tank; there is swimming nearby; more time outside in nature; relatively inexpensive
Cons: Not a great choice if you don’t feel comfortable with the possibility of setting up or putting away tent in the rain, if you don’t have a warm sleeping bag or appropriate sleeping layers if you’re hiking during the shoulder season, or if you don’t have all the camping and cooking gear required to be self-sufficient
Some notes about the different huts and campsites:
Brod Bay: This a really nice campsite right next to Lake Te Anau. It’s also a great spot if you’d like to see a kiwi. They live in the area and can be spotted after dark with a red light. I regret not going out to look for them! There are quite a few sandflies, so bring bug spray. Mice also live here and have been known to chew through tents and backpacks in search of food. We hung up all of our food under the cooking shelter in a dry bag and didn’t have an issue.
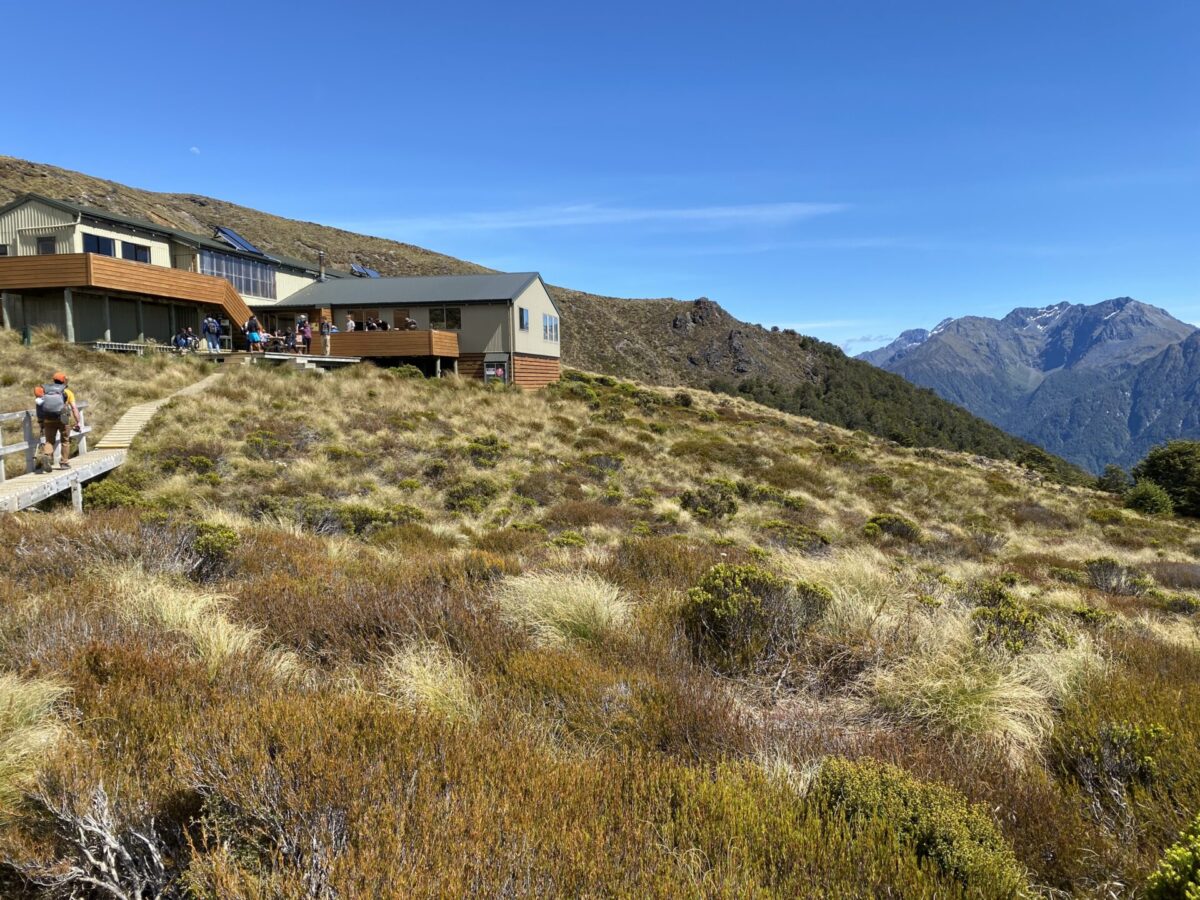
Luxmore Hut: This is a beautiful area overlooking Lake Te Anau’s South Fiord and with a great sneak peek of the coming mountain views. It’s a great spot to stay or even stop for lunch if you have a long day like we did. It’s also very close to the Luxmore Caves, which are worth exploring even if you’re not staying in the hut!
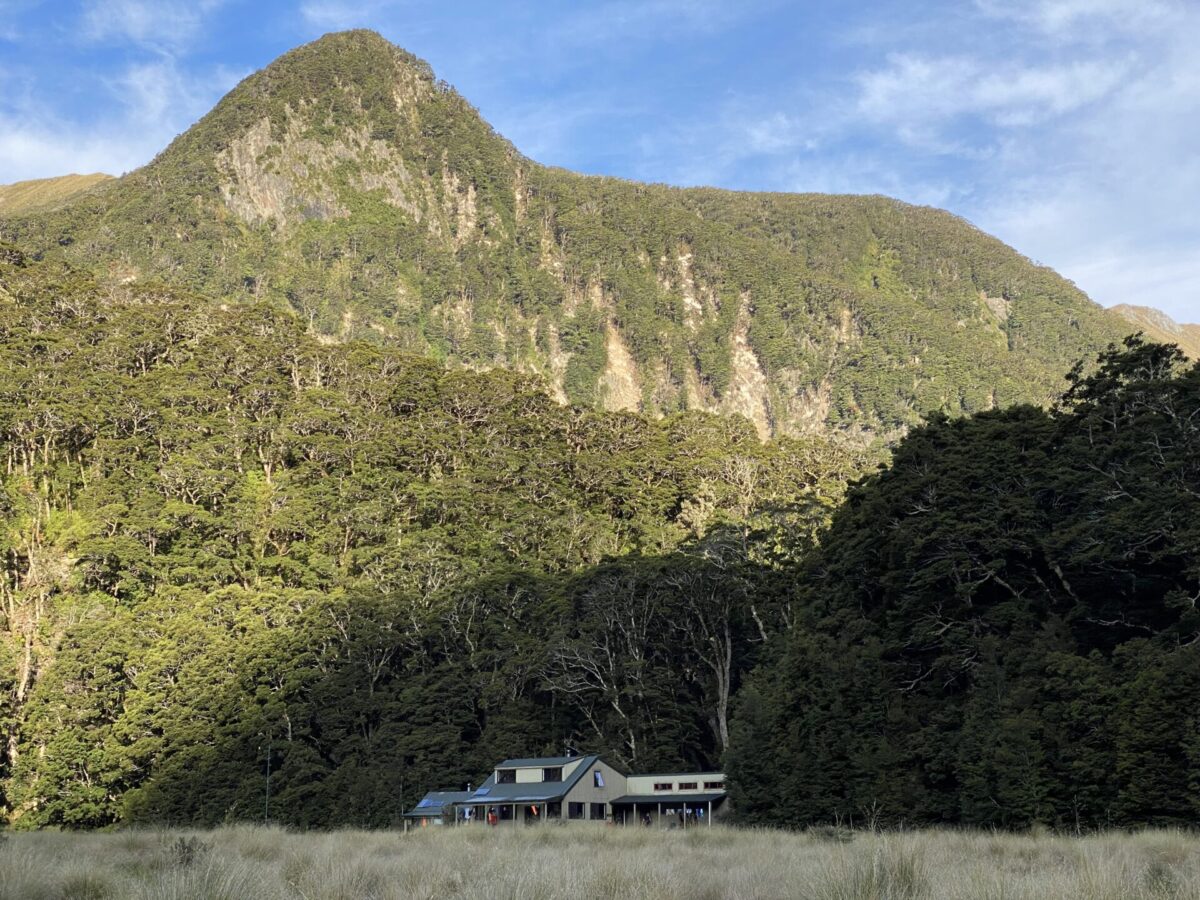
Iris Burn: Situated in a valley, Iris Burn hut and campsite are enveloped by towering cliffs and a gorgeous meadow. A short trail leads you to a nearby river, and another trail brings you to the Iris Burn Falls; both are fantastic swimming spots. If you’re lucky, you might even see a rare Little Blue Duck! Kiwi live here, so this is another good spot to go searching for them after dark. Beware of the sandflies and the mice if you’re camping.
Moturau Hut: This one is located right on Lake Manapouri. It’s a pretty spot! It’s a good place to camp if you want to do 4-5 days on the track or if you want to catch an earlier bus or get back on the road the next morning. I didn’t spend much time here, but I imagine there are sandflies and kiwis here as well.
My Experience Staying on the Kepler Track

My original plan when booking the Kepler Track was to camp for two nights and do the loop track over 3 days due to cost and the placement of the campsites along the track. I booked the Kepler Track only a couple of weeks before the start of my hike, and the campsites at Iris Burn were already booked up for my dates. Instead, my friend and I camped at Brod Bay on the first night and then stayed at the Iris Burn hut. This meant I had to fork over a significant chunk of change just for two nights on this track, so don’t follow my example! Book early if you can.
Since I was determined to do this hike over 3 days and not pay for transport, I ended up with some long, exhausting days averaging about 15-25 km per day. This is something to keep in mind for booking.
Doing the entire loop over 3 days is absolutely doable if you are an experienced hiker and like to push yourself; it will just mean some longer days. However, most people do this hike over 4 days and then either stay only in the huts or do a combination of huts and campsites. This option is also good if you’d like more time to do the side trips to the Luxmore Caves and Mount Luxmore.
If doing the entire loop track over 4 days, my recommendation would be to stay at Brod Bay campsite, then Luxmore Hut, then either the hut or campsite at Iris Burn.
To do the hike over 3 days but with shortened hiking options (as I outline below in the transport section), you could stay at Luxmore Hut and then Iris Burn hut or campsite.
Kepler Track Transport
Unlike many other Great Walks in New Zealand, the Kepler Track is a loop track, so you can do it without expensive transport to or from the trailheads as long as you have your own vehicle. It’s located right in the town of Te Anau or about a 2 hour drive from Queenstown. If you do need transport from Queenstown, there are a few operators who offer one-way or return transport. There are also some options to shorten the hike a little, which require a water taxi from Te Anau to Brod Bay campsite.
Self-Drive
If you have a car, this will be the cheapest option to complete the Kepler Track. You can park at either the Kepler Track car park or the Rainbow Reach car park which are both in Te Anau. Both car parks are free.
If you do drive, you can complete the entire loop and end back at your car. I chose this option and parked at the Rainbow Reach car park. Parking at Rainbow Reach instead of the more popular Kepler Track car park helped me to split up the kilometers of my hike more evenly over three days. If you plan to do the hike over four days, then you don’t really need to worry about the kilometers because your hiking days will be shorter anyway.
Important note about parking: Some Great Walks car parks in New Zealand have problems with car theft since the cars are often left unattended for a few days while hikers are out on the trail. To prevent car theft, make sure your doors are locked and there aren’t any valuables in sight.
Transport from Queenstown
Tracknet – Their roundtrip fair is $136 and includes a bus to and from Queenstown, with a drop off at Kepler Track car park and a pick up at Rainbow Reach car park. This option skips the section between the two car parks (about 9.5 km), but you won’t be missing out on much.
Fiordland Outdoors – Their roundtrip fair is $163 and includes a bus from Queenstown, a water taxi from downtown Te Anau to Brod Bay, and a bus from Rainbow Reach car park back to Queenstown. This option skips the section between Rainbow Reach and Brod Bay (about 15 km), but again you won’t be missing out on much. This is a good option for people who don’t mind paying a bit more or those who want to shorten the hike to focus more on the highlights.
Both operators offer one-way transport and also have multiple other connections to the Routeburn Track, the Milford Track, or Milford Sound if you aren’t going right back to Queenstown.
Transport from Te Anau
Tracknet – Fair for a return bus is $26 and includes drop off at Kepler Track car park and pick up at Rainbow Reach car park, skipping the 9.5 km between the two car parks. Alternatively, a fair of $42 would include a water taxi to Brod Bay and a bus pick up from Rainbow Reach car park, which would skip the 15 km section between Brod Bay and the car park.
Fiordland Outdoors – Fair is $45 and includes a water taxi to Brod Bay and a return bus from Rainbow Reach car park. This option skips the 15 km section between Rainbow Reach and Brod Bay.
Both companies also have a few other transport options (for example if you only need transport one way) and offer connections to other places in the area such as the Routeburn Track, the Milford Track, or Milford Sound.
Essential Packing List and Tips for Hiking the Kepler Track
What to Pack for the Kepler Track
- 40-60 Liter backpack
- 3 season sleeping bag
- sleeping bag liner (if camping in shoulder season and you don’t have a 4 season sleeping bag)
- 3 season sleeping pad (if camping)
- 3 season tent (if camping)
- backpacking stove, fuel canister and lighter (if camping)
- cutlery, cup, bowl, pot
- enough food and snacks to last for your trip (plus a little extra just in case)
- headlamp
- cold weather clothing (down jacket, fleece or sweater, long sleeve layers, pants, beanie, gloves, neck gaiter, extra pants layer, etc.)
- warm weather clothing (quick drying t-shirt, quick drying shorts)
- wet weather clothing (waterproof jacket, water resistant and quick drying pants and/or waterproof pants)
- extra set of clothes to sleep in and camp shoes (sandals or crocs work well)
- toiletries
- first aid kit/medications
- water bottles or water bladder (at least 2 liter capacity) plus a water filter
- phone and portable phone charger
- hiking boots or trainers (waterproof and with good traction)
- poop shovel and toilet paper (JUST IN CASE)
- optional: hiking poles, headphones, book or journal/pen, camera
Safety on the Kepler Track
This track is well marked and maintained with plenty of places to stop and rest, take a bathroom break or fill up water if needed. With that being said, accidents and emergencies do happen so here are a few tips to minimize any problems on the track:
- Bring at least 2 liters of water every day (there are water tanks at every hut and campsite, as well as rivers and waterfalls along many parts of the trail).
- Be sure to filter or treat any water you take while on the trail as none of it is treated.
- Keep your phone charged to use as a GPS (without wifi), in case of emergencies and of course as a camera! My favorite GPS app to use is Maps.me which allows you to download GPS maps for free to use offline. This has helped me on many trails and I can’t emphasize enough how important this is to have on a hike in case you get lost.
- Bring enough layers to stay warm and dry on the hike, including extra clothes if you have a wet forecast ahead.
- Wear appropriate hiking shoes with grip traction, comfort and stability.
- Bring extra food and snacks. For example, I met a group on my bus back to Queenstown that got stuck on the Milford Track for an extra day due to flooding. While they stayed at their hut they had to ration out their food so they had enough to finish the rest of the hike. You just never know, so bring that bit of extra food.
- Don’t attempt this hike outside of the Great Walks season unless you have navigation experience, are trained in handling avalanches and have survival gear!
- Tell people where you’re going and what your itinerary is!
My Kepler Itinerary
Day 1: Rainbow Reach Carpark to Brod Bay Campsite
Distance: 15.1 km
Time: About 4 hours
Difficulty: Pretty easy since this part of the track was mostly flat.
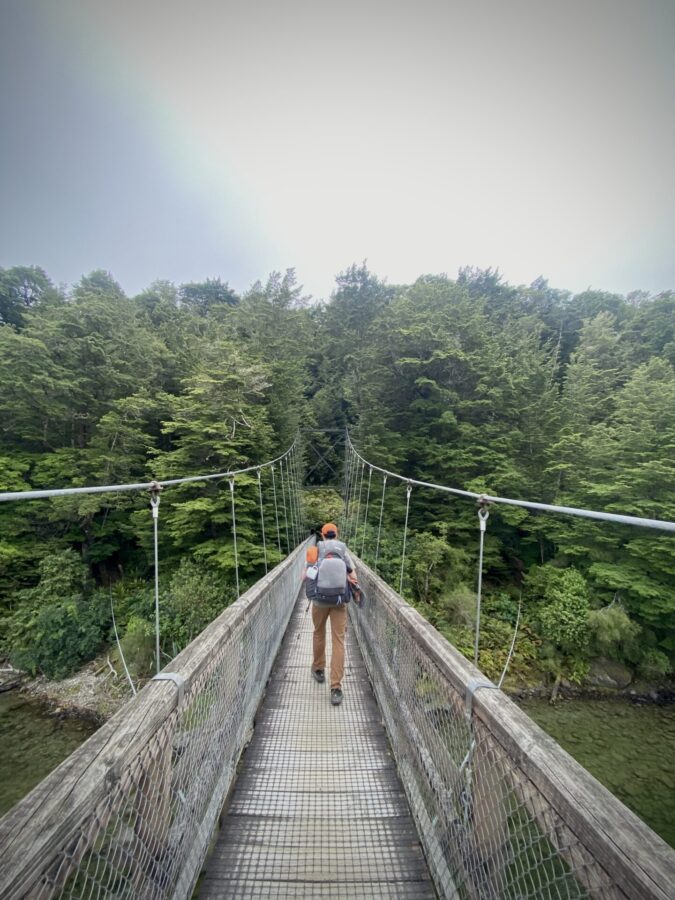
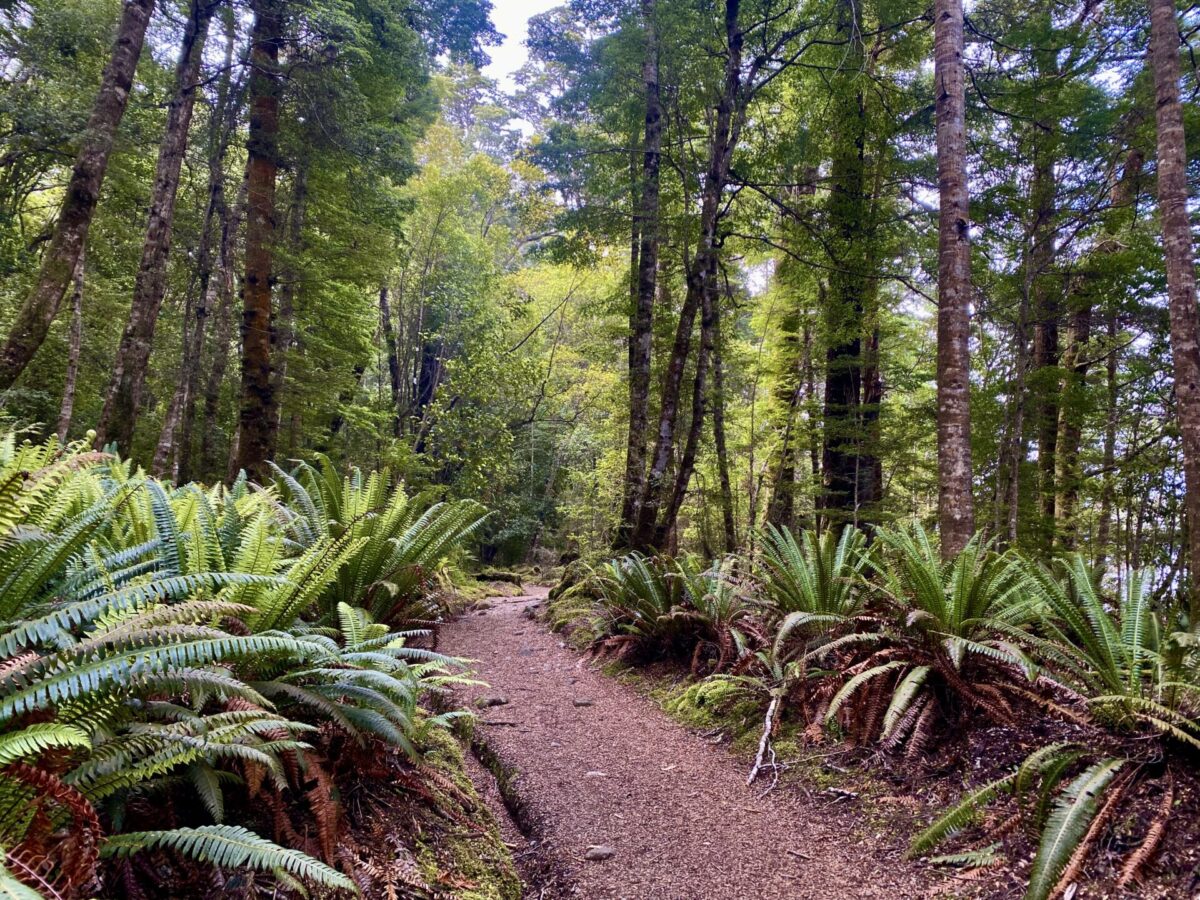
After driving the two hours from Queenstown, my friend Kevin and I embarked on our journey. Starting at the Rainbow Reach car park, we hiked across a bridge and then meandered our way through the forest along the shoreline of Lake Te Anau.
The forest here, much like the lowland forests all around Fiordland National Park, are filled with ferns and beech trees. Because this park receives on average 200 days of rain a year, it’s quite dense and green, with moss covering much of the area as well.
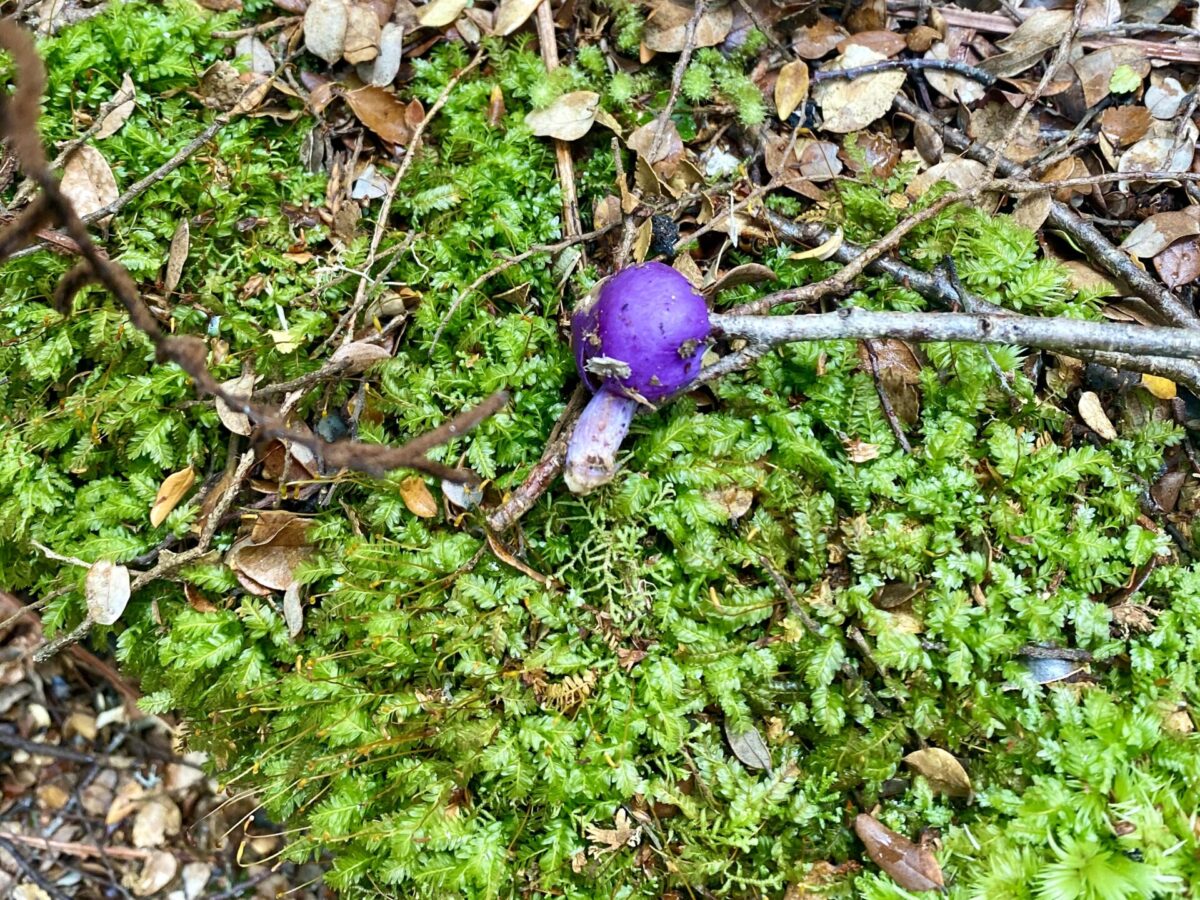
Where there is moisture and moss, there’s also likely to be mushrooms. I was shocked and delighted to find some fluorescent purple mushrooms on the trail that day! I had never seen mushrooms this color before.
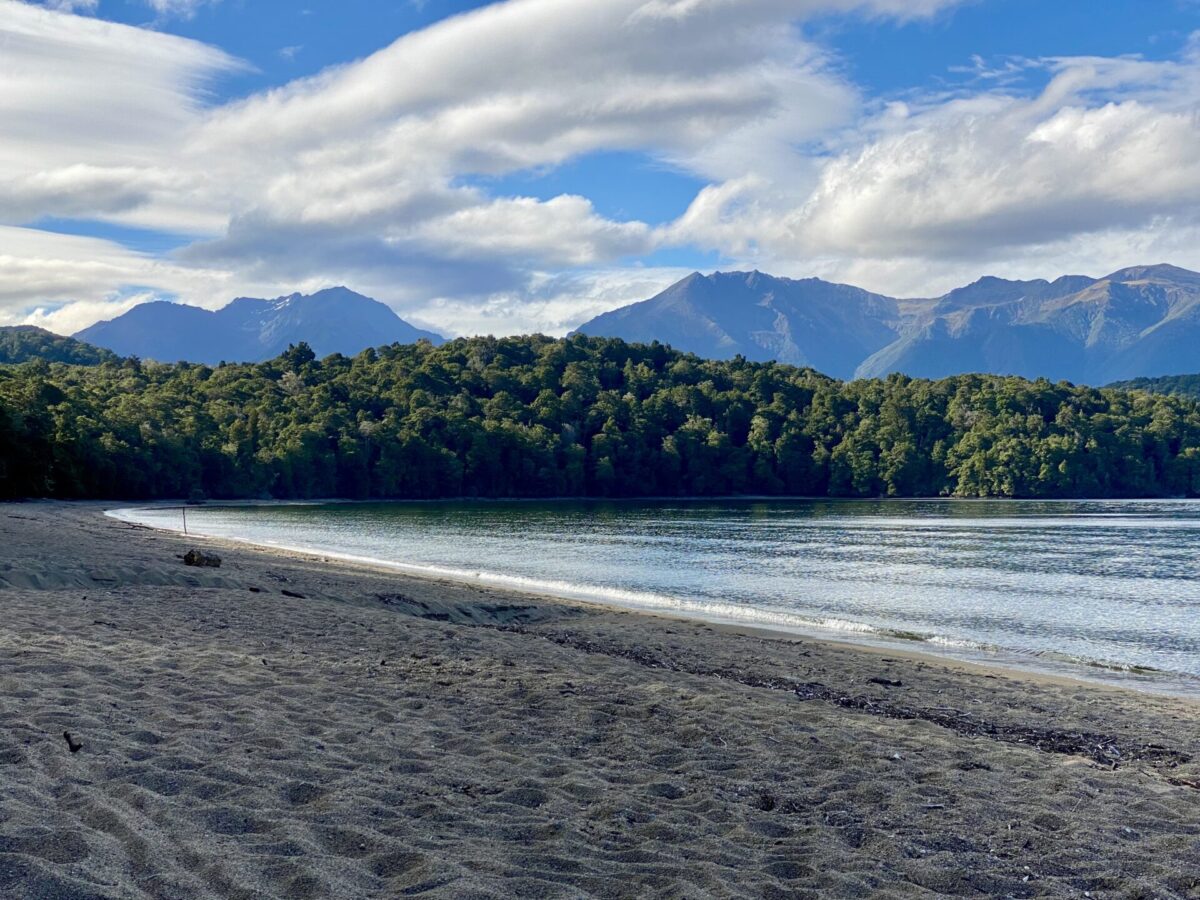
After about 4 hours of chill hiking (mostly just walking), we landed at Brod Bay campsite, which is situated right on Lake Te Anau with some great views of the lake and a little sneak peek of some mountain views.
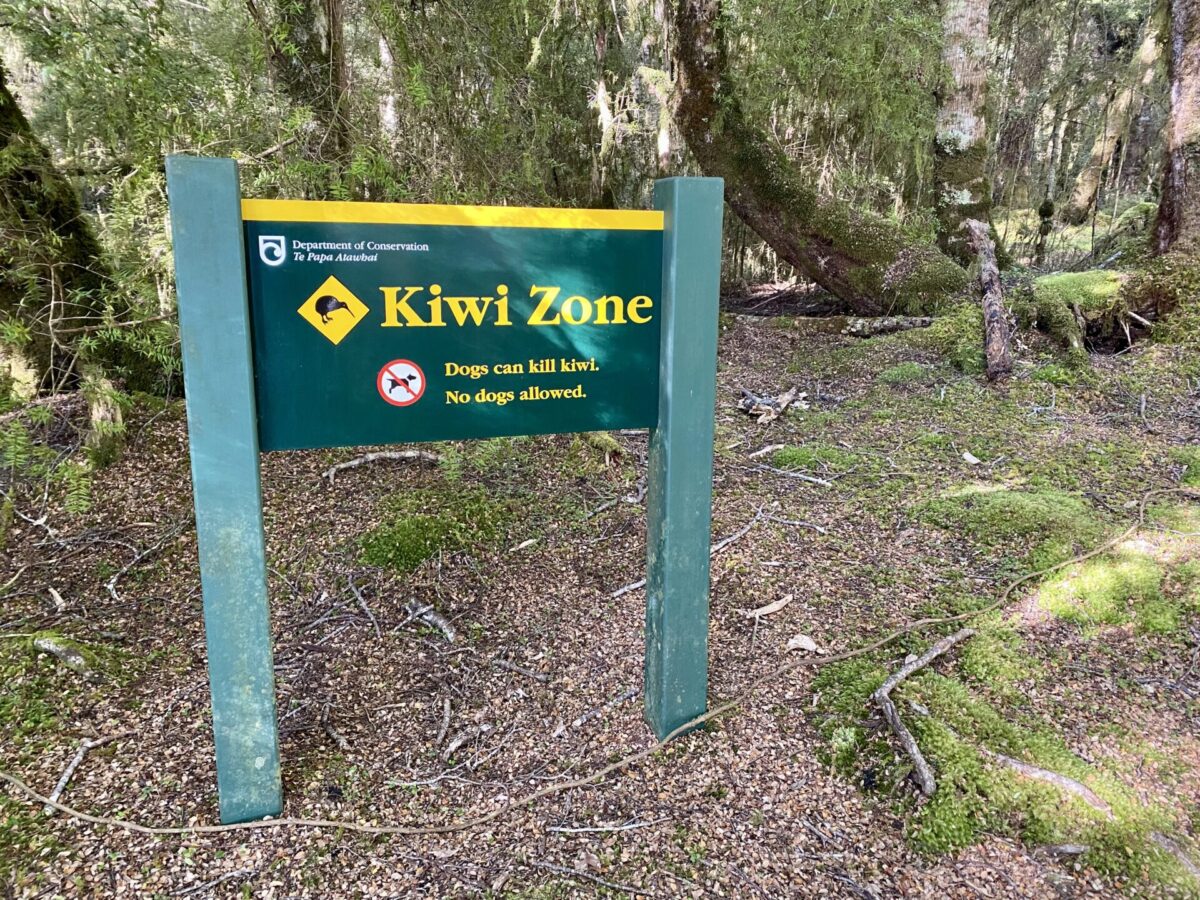
One cool thing about the Kepler Track is that there are quite a few kiwis that live here, so it’s possible to spot them after dark. I actually didn’t go looking for them at all, so sadly I didn’t see any on this trip. However, any of the campsites or huts that are situated in the forest will likely have kiwis living nearby, such as at Brod Bay or Iris Burn.
After taking a nap on the beach (while completely covered, because the sandflies were everywhere), Kevin and I gathered our food and cooked some dinner in the cooking shelter. Then we hit our tents for the night pretty early, since our second day would be the longest and hardest of the trip and we wanted to get as much rest as possible.
Day 2: Brod Bay to Iris Burn Hut
Distance: 22.8 km, not including side trips. With Luxmore Caves & Mount Luxmore side trips, it was closer to 25 km.
Time: Roughly 10.5 hours including breaks & side trips.
Difficulty: Hard and looong!
I’m just gonna say it. This day was challenging given the long distance, but absolutely incredible. It turned out to be quite a long day, but we saw all of the best highlights one after another after another.
The hardest part of our day was during the main ascent from Brod Bay up to the top of the treeline. There was a long hour or two of switchbacks before we came up high enough to see the farmland around Te Anau and some mountains in the distance. Since the view at this point was mostly farmland, I wasn’t super impressed.
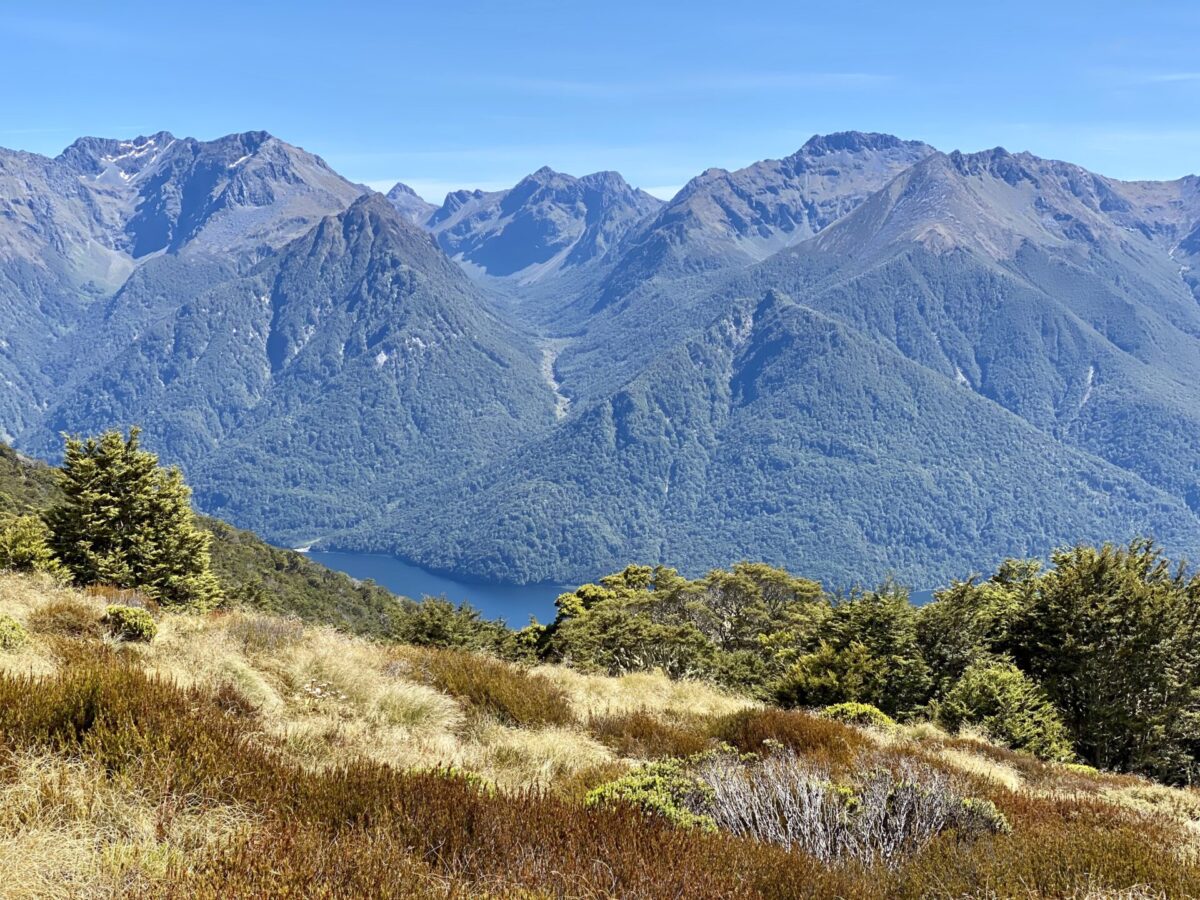
But after a bit more hiking, we reached the grassy ridgeline and observed just a little taste of the incredible mountain scenery that we came there for. The views continued to improve up to the Luxmore Hut, where we stopped for lunch.
Another interesting bird that can be found on the Kepler Track is the kea. Keas are endemic to New Zealand’s South Island and the world’s only alpine parrot. Large and deep green with red and blue underwings, they are super intelligent and curious about humans. They can be found wherever humans dwell around Fiordland National Park (among other mountainous areas around the South Island), and are known to cause mayhem by stealing food and other hiker items on the trails.
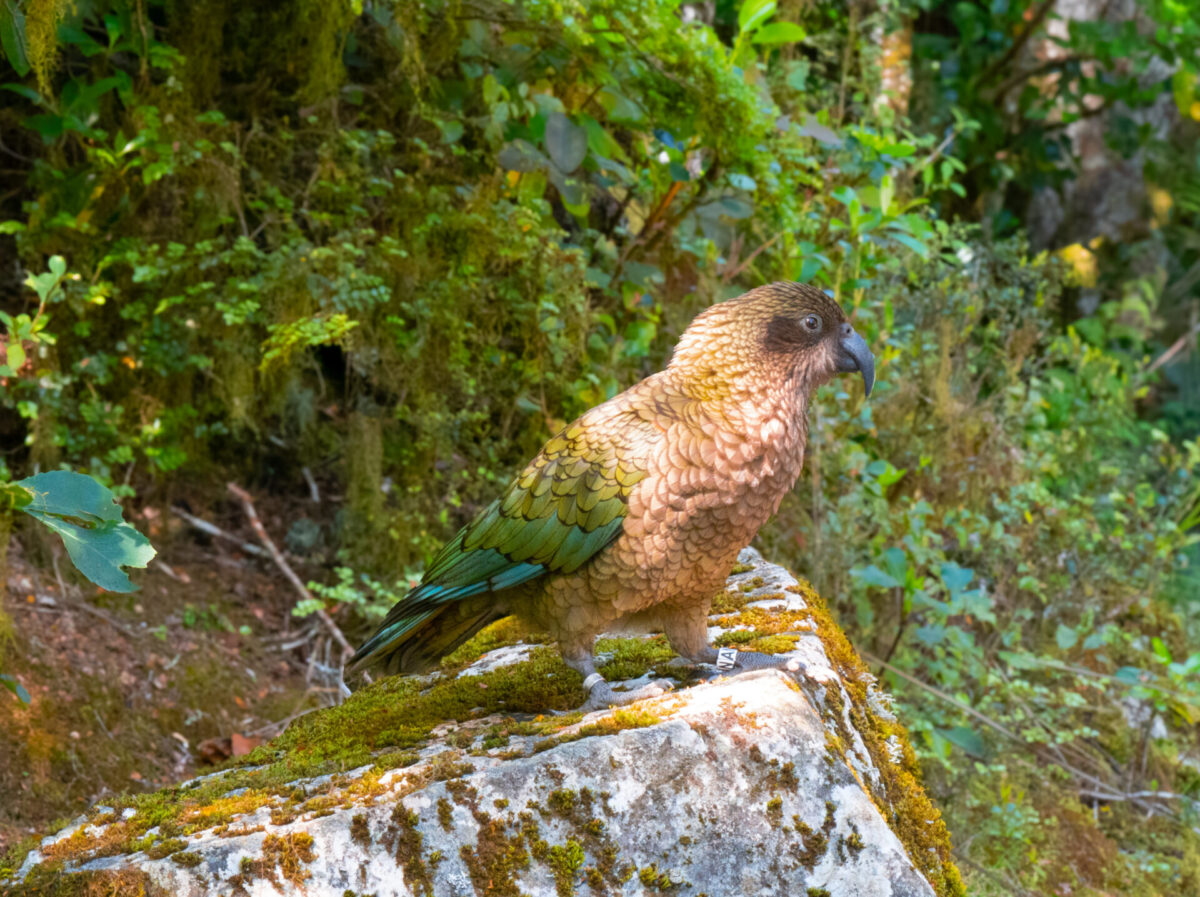
While we were enjoying our sandwiches on the deck of the Luxmore Hut, we saw two cheeky keas hopping around looking mischievous! We made sure to keep our belongings secure when we left to go explore the nearby Luxmore Caves, lest any keas take an interest in one of our backpacks.
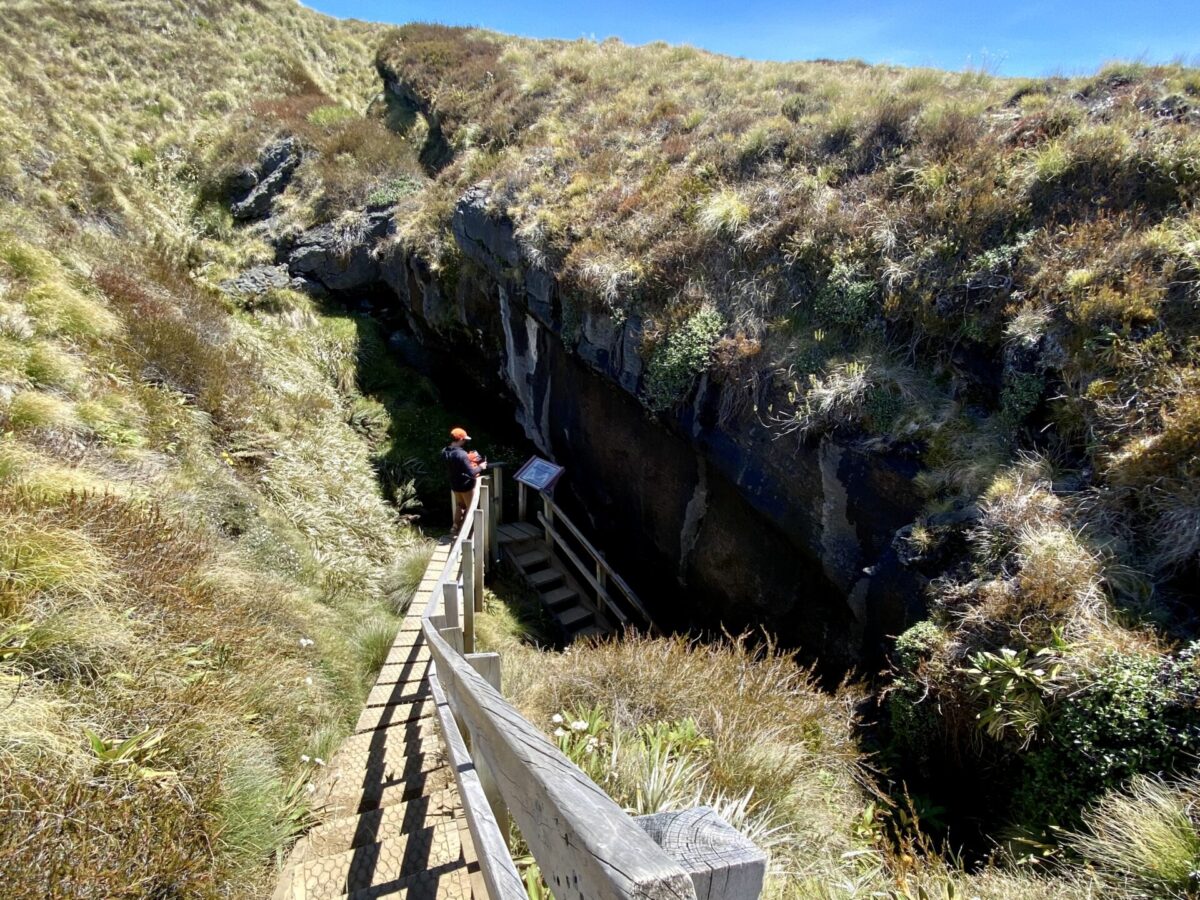
The entrance to the Luxmore Caves is about a 10-minute walk from the hut. We ventured inside with our headlamps, walking along the stream, squeezing between narrow walls, ducking under ledges, and ogling at every little waterfall and ceiling formation. We spent about an hour out and back, but the cave continues on for a while, so you can explore as much or as little as you like. It’s not super safe to do this after heavy rain, but you could probably at least take a peak at the entrance.
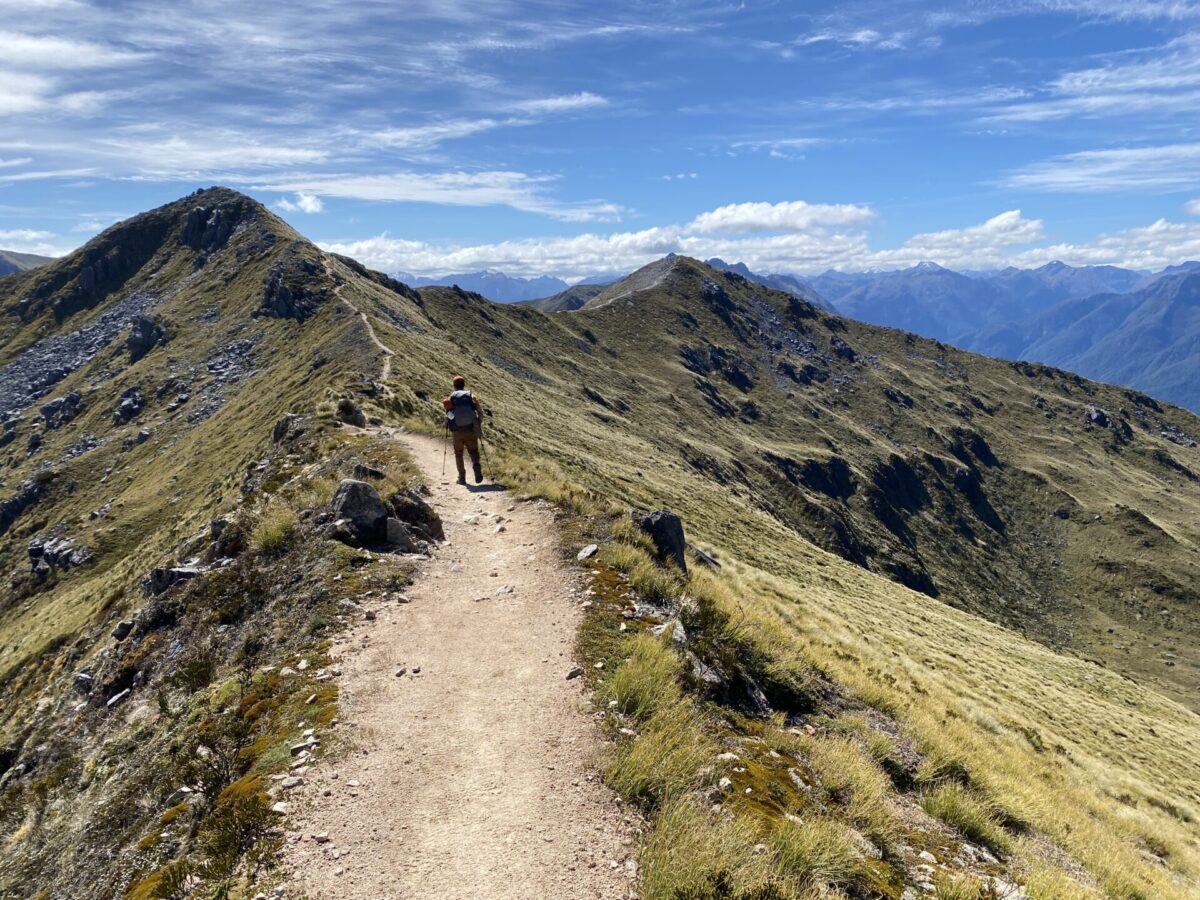
After our break at Luxmore, we continued hiking on the Kepler Track. There was quite a bit more ascent to do before we reached the main ridgeline, but all of our views after Luxmore were incredible regardless. We also hiked the quick side route up to Mount Luxmore, which took about 30 minutes round trip including a break at the top.
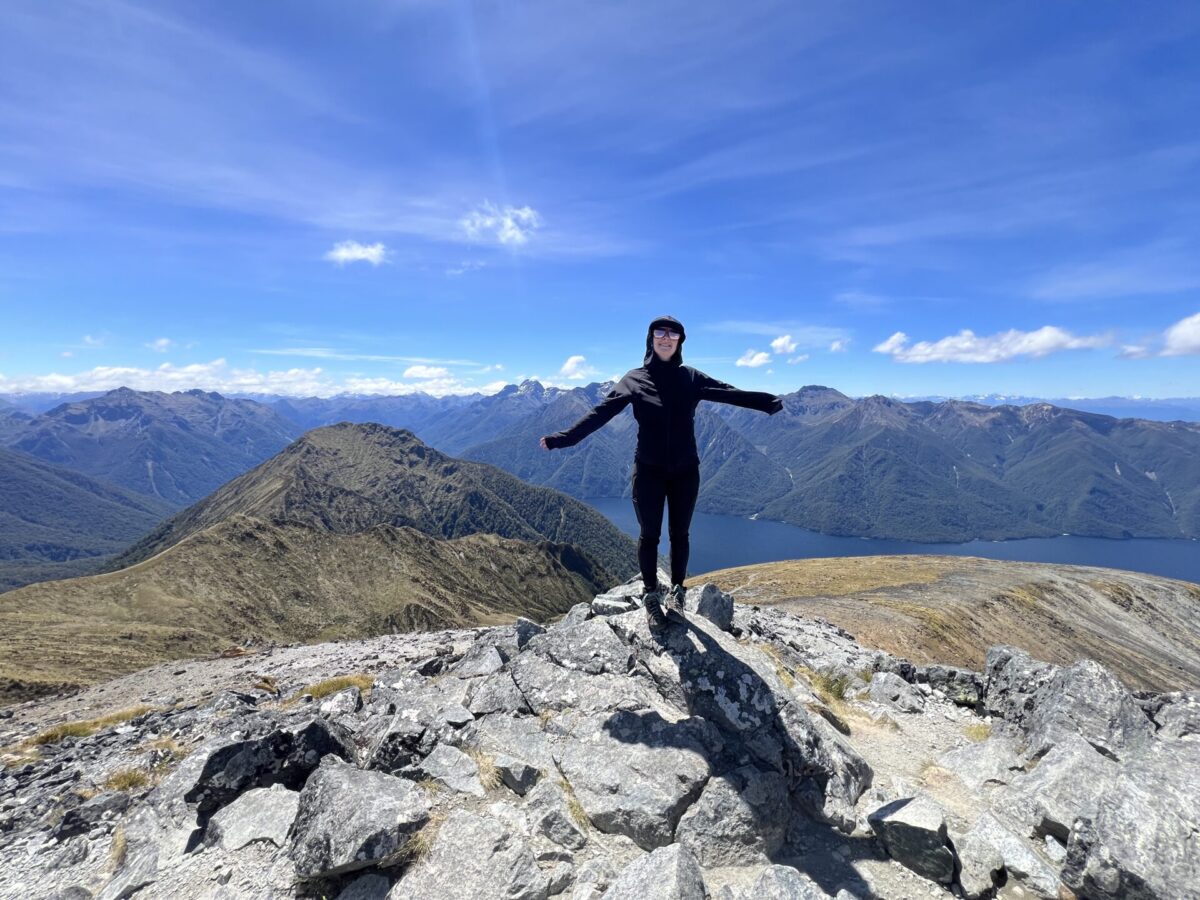
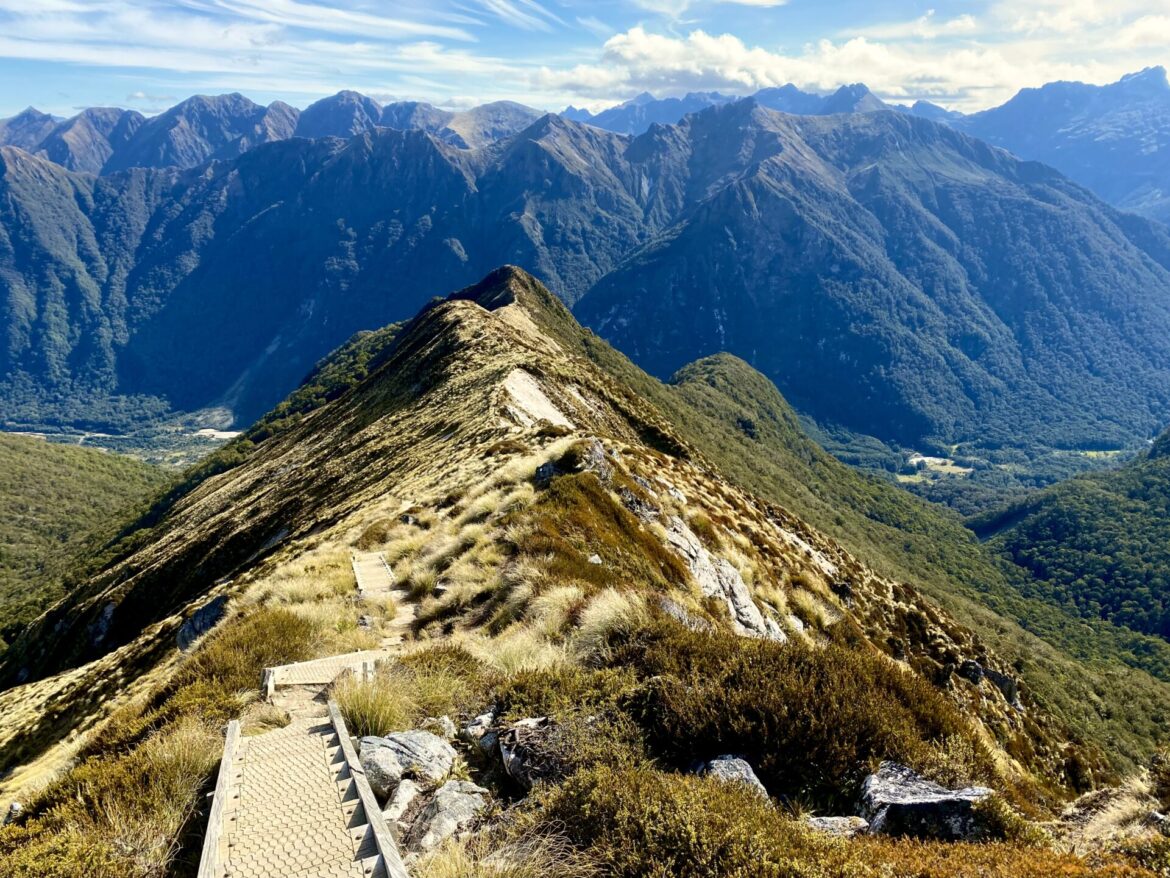
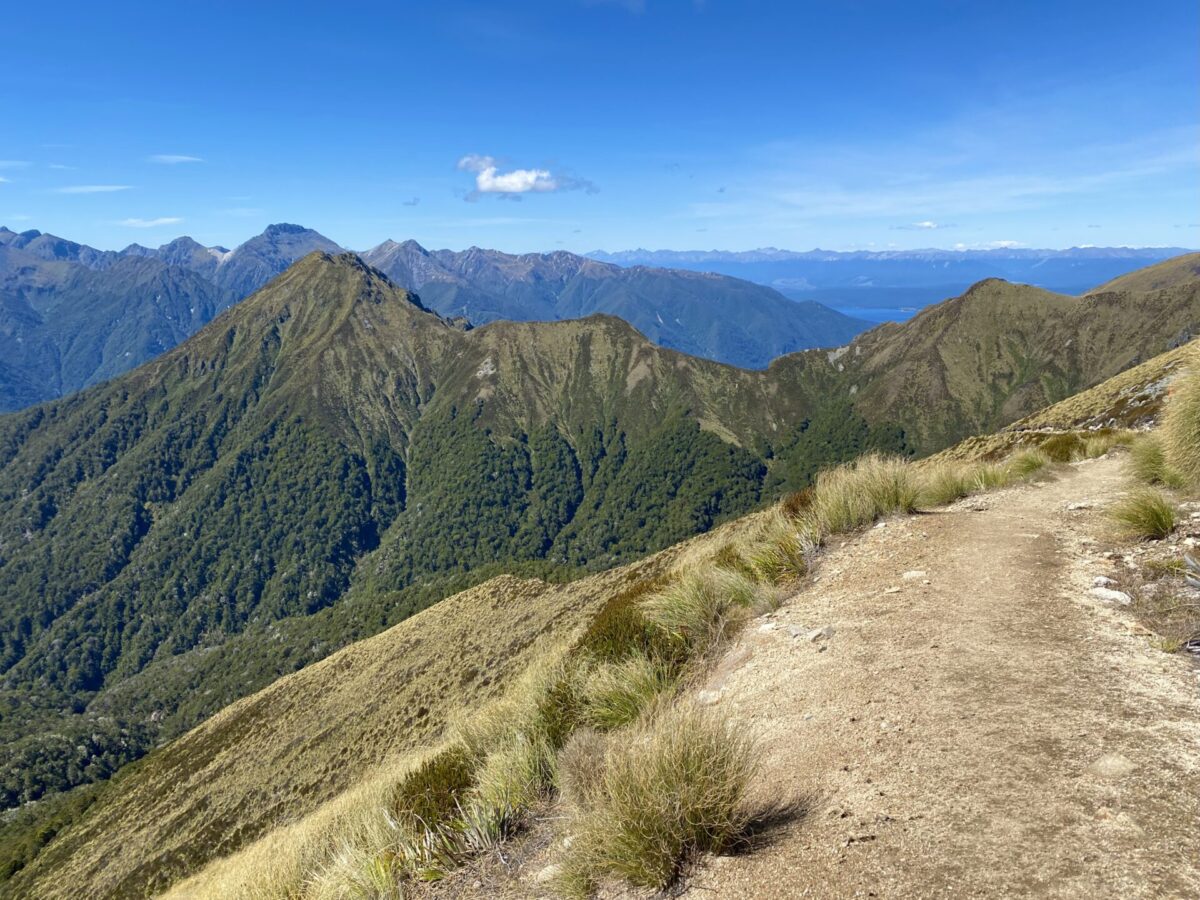
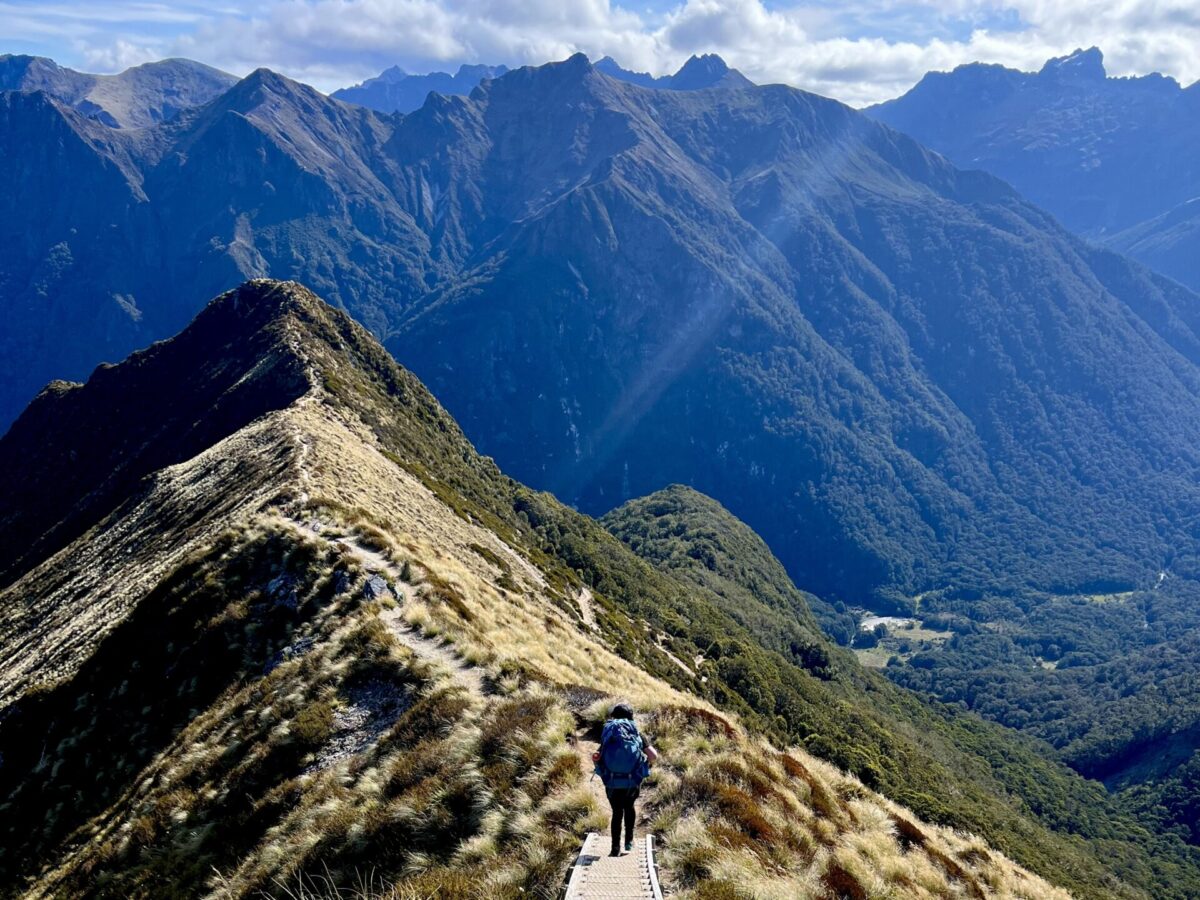
What I found to be the coolest part of the Kepler Track was that every time we hiked over or around a new hill on day two, there were just more expansive views. The 360-degree views felt never ending! All around us were layers and layers of mountain peaks. This is the best part of the track and why it’s so popular.
Somewhere along the ridgeline we also heard another kea calling in the distance. A few minutes later, we saw it flying just overhead where it did a beautiful wing show for us!
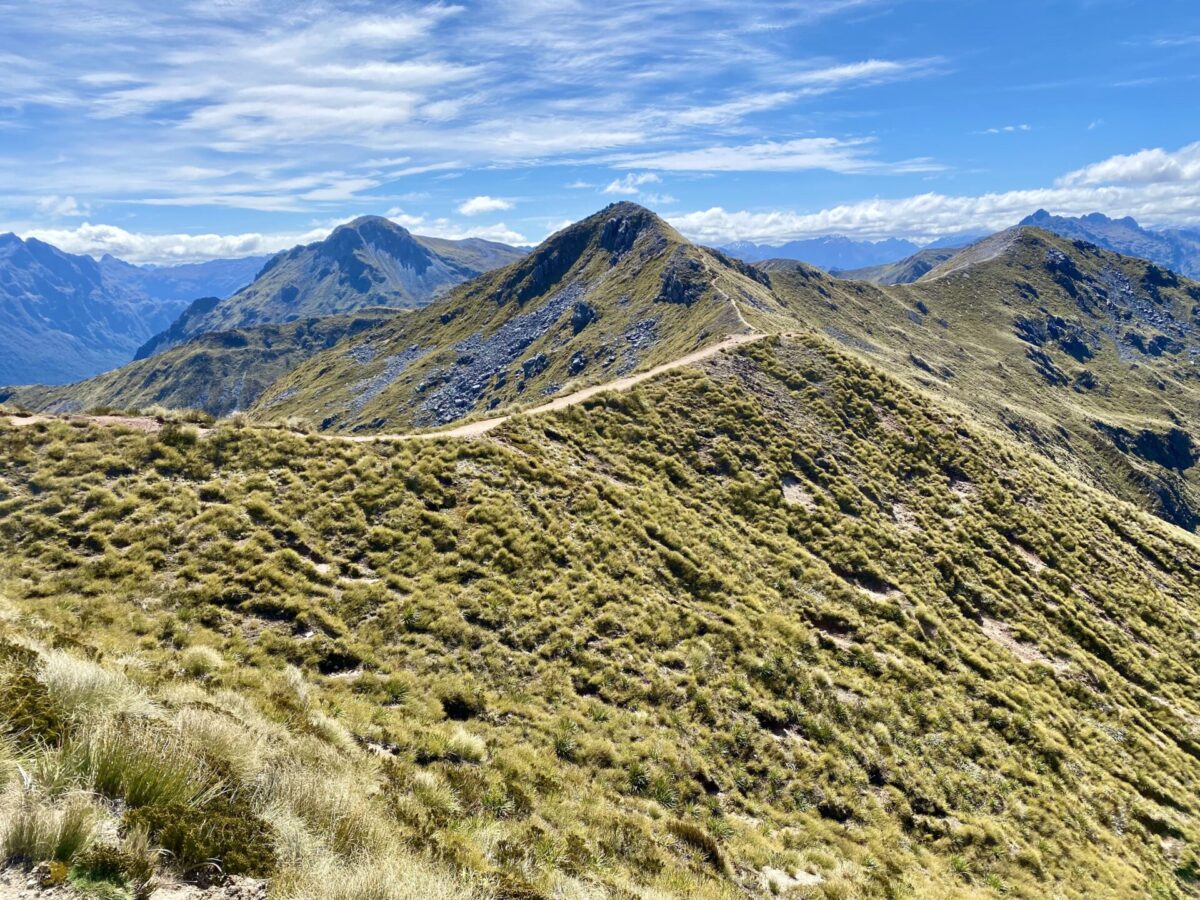
After hiking up and along the peaks of the Kepler Track, we had one final amazing mountain scene before we began hiking down towards the treeline and the steep descent into the Iris Burn Valley.
Once we were back under tree cover, we started taking steep switchbacks all the way down into the valley. This for me was the other hard part of the day, as we had hiked many kilometers over many hours and I just wanted it to be over!
We finally arrived at the peaceful valley at Iris Burn, where I took some time to rest and stretch before going to explore the meadow and the nearby Iris Burn River. I loved this area and took my time wandering around in the tall grasses as the sun lowered behind the mountains. Later, we cooked dinner and then finally went to sleep. Because I was so exhausted, I chose not to go out looking for kiwis! However, one other group went out but they didn’t find any, so maybe I didn’t miss out on much.
Day 3: Iris Burn to Rainbow Reach Carpark
Distance: 22.2 km
Time: About 6 hours including breaks.
Difficulty: Not so hard because it’s mostly flat, but the kilometers still made it a long day.
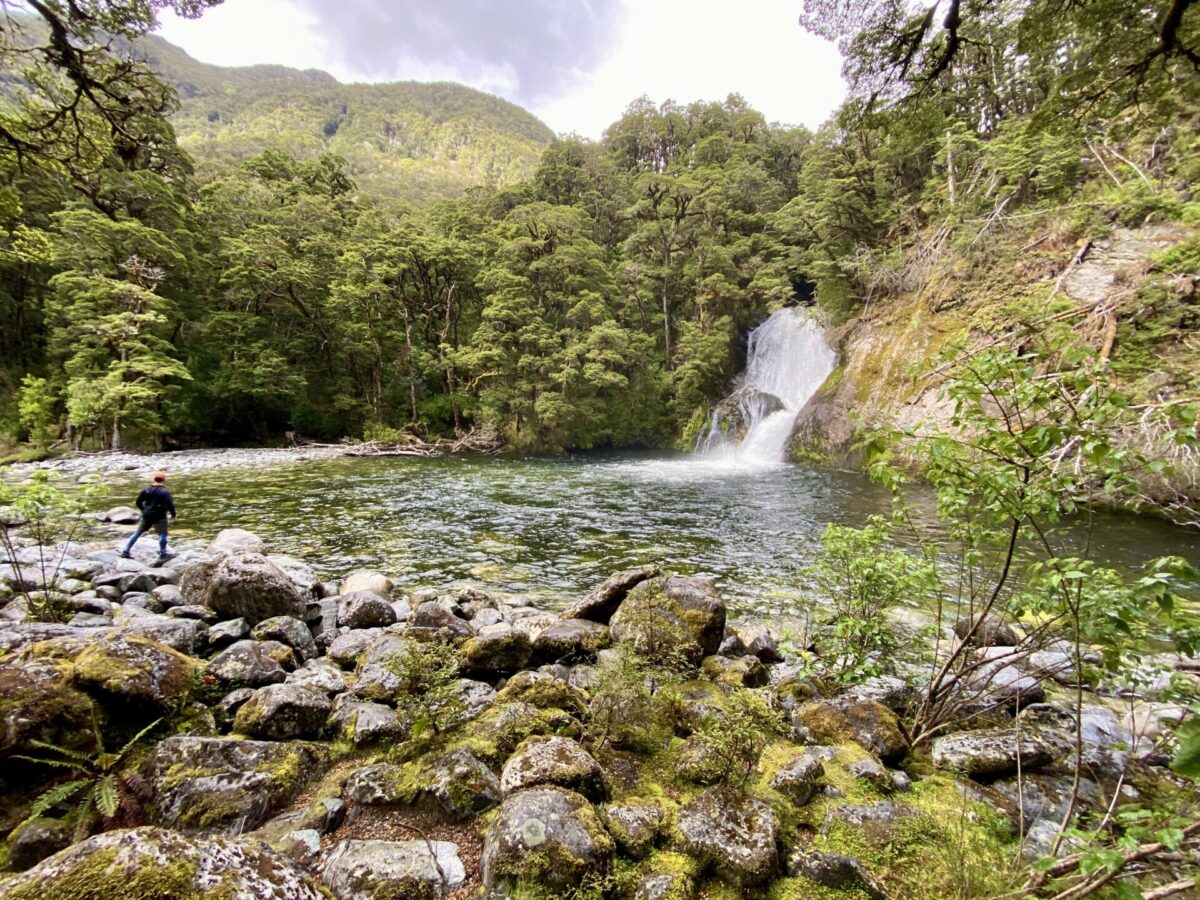
After breakfast, packing up our belongings and bracing ourselves for another 20-something-kilometer day, we hiked first to the Iris Burn Falls. Here, we took in the waterfall and its surroundings and were blessed with the presence of a rare Little Blue Duck! It’s estimated that only about 3,000 of these endangered ducks are left in New Zealand as introduced mammalian predators have greatly reduced their numbers, so it’s special to see them in the wild!
The remainder of our hike followed rolling hills through the fern and beech forest, passing the Moturau Hut, until we finished the loop track back at Rainbow Reach car park. Tired and thirsty, we drove into Te Anau to grab a celebratory end-of-hike beer.
For those of you unfamiliar with Te Anau, be aware that most restaurants fully book up every evening and that usually you need to have a reservation to get a seat. Walking in to grab a quick beer isn’t as simple as you might think (let alone food)! We got turned away at one or two places but had luck at The Moose Bar & Restaurant, which was also packed. On my first visit to Fiordland, the same thing happened on our way out of the park as well, so we had to settle for pizza when all we could think about were burgers. To avoid this hassle, consider making reservations before your trip or be prepared for disappointment.
Have an Amazing Trip!
If you love the Kepler Track like I did, you’ll love the rest of Fiordland, too. I’ve written separate posts on hiking the Routeburn Track and other things to do in Te Anau and Fiordland National Park, so be sure to check those out as well. For other Great Walks around New Zealand, I also wrote posts for the Rakiura Track, the Abel Tasman Track, and the Tongariro Northern Circuit.
I hope you enjoyed this post and good luck on your Kepler Track! Tell me about your experience below and share this post with your hiker friends! 🙂

Leave a Reply